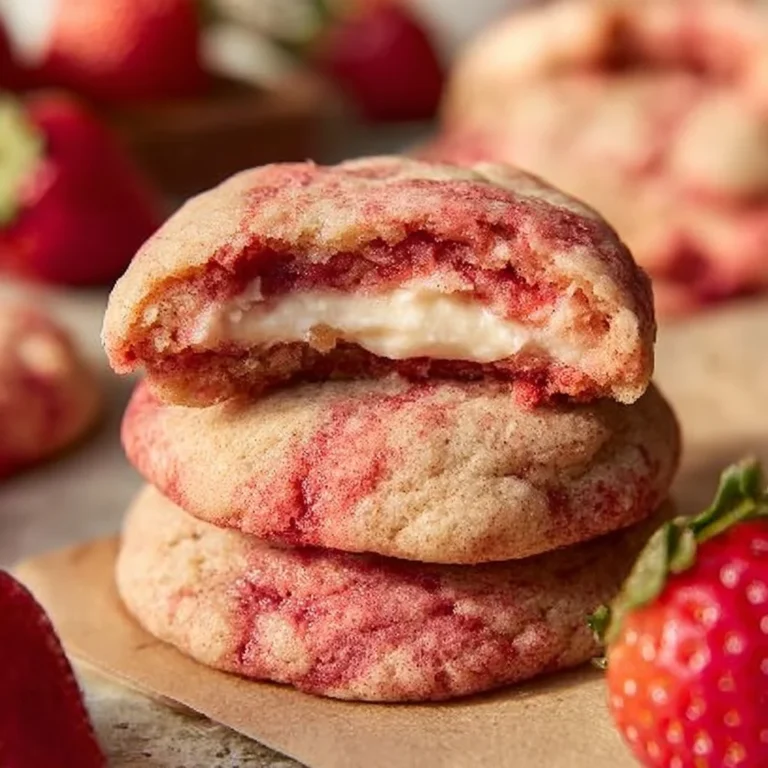
Strawberry Kiss Cookies
Do you ever get a sudden craving for something sweet that takes you back to a sunny kitchen, flour on your fingers and the smell of warm butter in the air? I do — often — and that’s how these Strawberry Kiss Cookies were born in my mind on a rainy afternoon when I wanted something bright and comforting. If you’re a beginner who worries about dough that’s too sticky or kisses that melt into puddles, you’re in the right place: this recipe is forgiving, friendly, and exactly the kind of cozy baking project I love sharing. If you want a similar feel but crave a chewier base, I sometimes lean on my chewy sugar cookie recipe for inspiration.
A Quick Look at This Strawberry Kiss Cookies Recipe
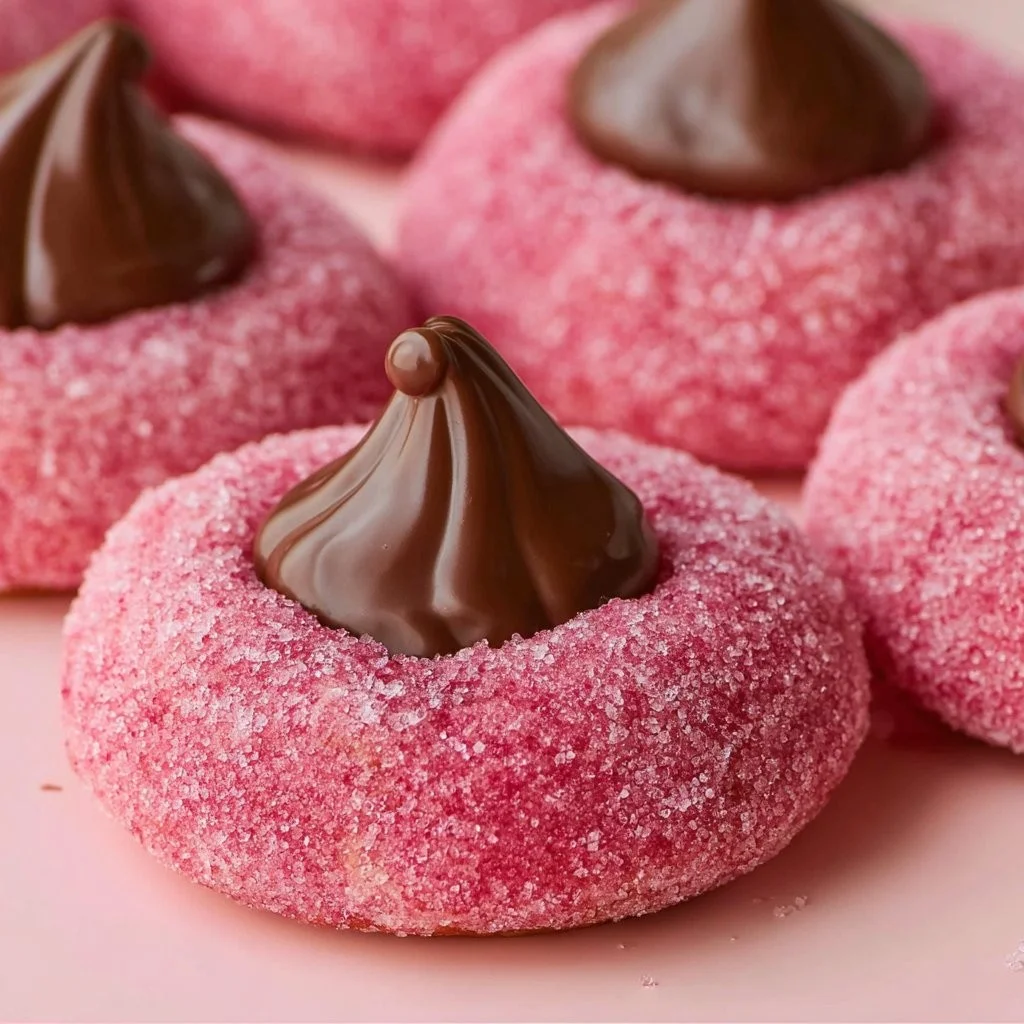
This Strawberry Kiss Cookies recipe blends soft, buttery cookie dough with strawberry-flavored gelatin for a gentle, fruity flavor and finishes with a melty chocolate kiss in the center. The main ingredients that define this cookie are unsalted butter and strawberry gelatin mix, which create a tender, fragrant base. It’s a comfort-baking win: straightforward to prep, quick to bake, and great for making batches to share. Perfect for home cooks and beginners because the technique is simple, and the results feel special — keep scrolling to see how easily you can personalize them.
Ingredients You’ll Need for Strawberry Kiss Cookies
Essentials
- 1 cup (226g) unsalted butter, softened — Softened butter (not melted) gives the cookie a tender, rich crumb. If you forgot to set it out, I’ll show a quick trick in the steps.
- 1 cup (200g) granulated sugar — Provides structure and lightness. You can adjust slightly for sweetness, but this amount keeps the texture right.
- 1 large egg, at room temperature — Room-temp eggs mix in more easily and help the dough come together.
- 1 tsp vanilla extract — Classic, warm flavor that balances the strawberry.
- 1/2 tsp almond extract (optional) — A little almond extract elevates the strawberry flavor; use sparingly because it’s potent.
- 2 cups + 2 tbsp (280g) all-purpose flour — The basis of the cookie; measure by weight when possible for consistent results.
- 1 tsp baking powder — Gives a gentle lift so the cookies stay soft, not cakey.
- 1/4 tsp salt — Brings out the sweetness and balances flavors.
- 1 package (3 oz) strawberry-flavored gelatin mix — This is the secret ingredient: it adds strawberry flavor and a subtle pink tint without fuss.
- 24–30 chocolate kiss candies, unwrapped — These go on the warm cookies and make the finish — use your favorite chocolate.
- 1/4 cup powdered sugar, for dusting — A light sweet dusting that makes them look festive and adds a little delicate sweetness.
Optional add-ons
- Finely grated lemon zest (1/2 tsp) — Brightens the strawberry without making it tangy; I add this on occasion for a sunny note.
- 1–2 tablespoons freeze-dried strawberry powder — If you want a stronger real-strawberry taste and extra color, mix this into the dough.
- A splash of white chocolate drizzle — Melted white chocolate drizzled over cooled cookies looks pretty and adds sweetness.
- Sprinkles or crushed freeze-dried strawberries — For texture and color on top of the white chocolate drizzle or to press into the cookie before baking.
Substitutions and shortcuts
- Butter substitute: I don’t recommend swapping butter for margarine — flavor and texture suffer — but you can use a European-style butter for a richer taste. If you must, use a 1:1 stick but expect slightly different spread.
- Sugar swaps: You can try half granulated sugar and half light brown sugar for a deeper, toffee note, but the cookies will be a touch chewier and darker.
- Gelatin alternative: If you don’t have boxed gelatin, 2 tablespoons of freeze-dried strawberry powder plus an extra 1–2 tbsp sugar can work — you’ll lose some of the jiggly aroma but keep strawberry flavor.
- Egg substitute: For an egg-free version, use 1/4 cup unsweetened applesauce plus a tablespoon of oil; texture will change (softer and less structured).
- Quick chill: If you’re short on time, pop the rolled cookie balls in the freezer for 15–20 minutes instead of the fridge. They’ll firm up faster but don’t freeze solid.
How to Make Strawberry Kiss Cookies Step-by-Step
Below I walk you through each step like I’m standing beside you in the kitchen. Read through before starting so you’re comfortable with the rhythm.
Prep the butter and egg (30–60 minutes before baking)
- Remove the butter and egg from the fridge 30–60 minutes before you start. The butter should be soft enough that your finger leaves an indentation but not greasy or melted. The egg should be at room temperature so it blends smoothly with the butter and sugar.
- If you’re pressed for time and the butter is still cold, cut it into small cubes and let those sit for 10–15 minutes; or microwave in 5-second bursts (turn the stick) until slightly softened — be careful not to melt.
Cream butter and sugar (2–3 minutes)
- In a large mixing bowl, beat the softened butter and granulated sugar on medium speed for 2–3 minutes. You’re aiming for a light, fluffy texture: the sugar will slightly dissolve into the butter and the mixture will look paler.
- If you’re using a stand mixer, use the paddle attachment. If using a hand mixer, go back and forth between medium and medium-high so the mixture aerates evenly.
Add egg and extracts (mix until smooth)
- Crack in the room-temperature egg and add the vanilla extract and almond extract (if using). Beat on medium speed until fully incorporated and smooth — about 30–45 seconds.
- Scrape down the sides of the bowl with a spatula to ensure even mixing.
Fold in the strawberry gelatin
- Sprinkle the entire 3 oz packet of strawberry gelatin into the bowl and fold it into the wet mixture with a spatula. It might look a little granular at first — that’s okay; the gelatin adds flavor, color, and a tiny bit of structure.
- If you’re using freeze-dried strawberry powder, add it now and mix until evenly dispersed.
Whisk the dry ingredients separately
- In a different bowl, whisk together the all-purpose flour, baking powder, and salt. Whisking helps distribute the baking powder evenly so every cookie rises uniformly.
Combine dry and wet until a soft dough forms
- Add the dry mix to the wet mix in two additions, beating slowly or folding with a spatula until just combined. The dough should be soft and slightly sticky but hold its shape when scooped.
- Don’t overmix: once you can’t see pockets of flour, stop. Overworking develops gluten and will make cookies tougher.
Portion and chill the dough (at least 1 hour)
- Use a 1-tablespoon cookie scoop (or measure with spoons) to form 1-tbsp balls. Rolling between your palms helps create smooth rounds.
- Place them on a baking sheet or tray, cover lightly, and chill in the refrigerator for at least 1 hour. Chilling solidifies the butter so the cookies spread minimally and keep their soft, pillowy texture.
- Tip: If you want to bake part now and part later, you can freeze the scooped balls on a baking sheet until solid, then transfer them to a zip-top bag for up to 3 months.
Preheat the oven to 350°F (175°C)
- Preheat the oven while the dough is chilling so it reaches temperature by the time you bake. Line a baking sheet with parchment paper or a silicone mat.
Arrange chilled balls on the baking sheet
- Place chilled dough balls 2 inches apart on the prepared sheet. This gives them room to spread slightly without merging.
- If the dough has chilled into very hard balls, let them sit at room temperature for 5 minutes — still cold but not rock-solid.
Bake for 11–13 minutes
- Bake for 11–13 minutes, or until the edges are just set and the centers look slightly underbaked; this keeps them soft after cooling.
- Rotate the baking sheet halfway through if your oven has hot spots. The tops should be pale with a hint of golden edges.
- Add the chocolate kisses
- Once you remove the cookies from the oven, let them rest on the baking sheet for 2 minutes — this gives the cookies a moment to set so pressing chocolate won’t crack them.
- Gently press an unwrapped chocolate kiss into the center of each cookie. The warmth will slightly soften the chocolate and help it nestle into the cookie without melting completely.
- Dust and cool
- Lightly dust the tops with powdered sugar while the kisses are still slightly glossy. This looks pretty and adds a delicate sweetness.
- Transfer cookies to a wire rack to cool completely. If you’d like, when cooled, drizzle them with white chocolate and sprinkle crushed freeze-dried strawberries or sprinkles for a finishing touch.
Extra beginner tips
- Use a kitchen scale for flour and butter for best results — baking is part science, and weight yields consistency.
- If your dough seems too dry, add a teaspoon of milk or cream and mix until the dough just comes together.
- If your oven runs hot, lower the temperature by 10–15°F and check the cookies a minute or two earlier.
Common Mistakes to Avoid
Baking cookies seems straightforward, but a few small missteps can change the outcome. I’ve learned these the hard way, so here are the most common pitfalls and how to avoid them.
Mistake 1: Using butter that’s too cold or too warm
If butter is too cold, the dough won’t cream properly and your cookies will be dense. If it’s too warm or melted, the cookies will spread too much and become thin and greasy. Aim for butter that’s soft but still cool to the touch. If you make this mistake, chill the dough before baking and your cookies will behave.
Mistake 2: Overmixing the dough
Once you add flour, overmixing develops gluten and makes cookies tough. Mix just until no dry streaks remain. If you notice a tight, rubbery dough, stop mixing and chill it — the cooler temperature helps relax the texture, but the end result may still be firmer than ideal.
Mistake 3: Skipping the chill step
Chilling is crucial for texture and flavor concentration. Skipping it can produce cookies that flatten and lose the tender center. If time’s tight, freeze the scoops for 15–20 minutes to firm them up. I’ve saved many batches this way and still gotten great results.
Serving Suggestions for Strawberry Kiss Cookies
These cookies are comfort food with a little festive flair. They’re wonderful warm from the oven, but they also travel well and look adorable in a cookie tin. Below are three ways I like to serve them depending on the occasion.
Tea time and cozy afternoons
Pair a plate of warm Strawberry Kiss Cookies with a pot of black tea or a mug of warm milk. The strawberry and chocolate pair beautifully with milky beverages, and the soft texture makes them perfect for dunking.
Party platters and gifting
Arrange them on a tiered platter for baby showers, birthday parties, or book club snacks. They’re charming in cellophane bags tied with a ribbon for gifting. I often add a little note describing the cookie so recipients know to warm them slightly for the best experience.
Dessert upgrades and combos
Turn two cookies into a sandwich with a layer of whipped cream or mascarpone and a few crushed freeze-dried strawberries for crunch. You can also crumble them over vanilla ice cream for an impromptu sundaelike dessert. The chocolate kiss holds up and adds that extra cocoa surprise.

Conclusion
I hope this guide makes Strawberry Kiss Cookies feel approachable; they’re easier than they look and so satisfyingly cozy to bake and share. I love how customizable they are — add lemon zest, swap in freeze-dried strawberries, or drizzle white chocolate for a special finish. If you want more ideas and a slightly different take, I sometimes consult the original Strawberry Kiss Cookies – Mama Needs Cake® for inspiration, and there’s another lovely version at Strawberry Kiss Cookies – Yummi Haus that’s worth a peek for creative toppings. Now grab your mixing bowl — I’d love to hear how your batch turns out.
FAQs About Strawberry Kiss Cookies
Stored in an airtight container at room temperature, Strawberry Kiss Cookies stay fresh for about 4–5 days. If you want them softer, add a slice of bread to the container — it helps keep moisture in. For longer storage, freeze the baked cookies (without the kiss) for up to 3 months; add fresh kisses after thawing or press onto warm cookies when you bake from frozen.
Yes. Use a 1:1 gluten-free baking flour blend that includes xanthan gum for structure. The texture may be slightly different — a touch more crumbly — but the flavor will still shine. Chill the dough well before baking to help them hold shape.
Absolutely. You can use small chocolate truffles, mini peanut butter cups (if not serving for nut-free groups), or a square of chocolate bar. If you use larger pieces, press them into the cookie once out of the oven and adjust baking time slightly to keep the cookies from overbaking.
For a stronger strawberry punch, add 1–2 tablespoons of freeze-dried strawberry powder to the dough and a touch of lemon zest (about 1/2 tsp) to enhance brightness. You can also press a small sprinkle of crushed freeze-dried strawberries into the tops before baking.
Yes, the dough keeps in the refrigerator for up to 48 hours; let it sit at room temperature for 5–10 minutes if it’s very firm before scooping. For longer prep, scoop balls and freeze them on a tray, then transfer to a sealed bag for up to 3 months — bake from frozen, adding a minute or two to the bake time if needed.

Strawberry Kiss Cookies
Ingredients
Essentials
- 1 cup unsalted butter, softened Softened butter (not melted) gives the cookie a tender, rich crumb.
- 1 cup granulated sugar Provides structure and lightness.
- 1 large egg, at room temperature Room-temp eggs mix more easily.
- 1 tsp vanilla extract Classic flavor that balances the strawberry.
- 1/2 tsp almond extract (optional) Elevates the strawberry flavor.
- 2 cups + 2 tbsp all-purpose flour Measure by weight for consistent results.
- 1 tsp baking powder Helps the cookies stay soft.
- 1/4 tsp salt Balances flavors.
- 1 package (3 oz) strawberry-flavored gelatin mix Adds flavor and subtle pink tint.
- 24–30 pieces chocolate kiss candies, unwrapped Use your favorite chocolate.
- 1/4 cup powdered sugar, for dusting Makes them look festive.
Optional add-ons
- 1/2 tsp finely grated lemon zest Brightens the strawberry flavor.
- 1–2 tbsp freeze-dried strawberry powder For a stronger real-strawberry taste.
- 1 splash white chocolate drizzle Adds sweetness and looks pretty.
- sprinkles or crushed freeze-dried strawberries For texture and color on top.
Instructions
Preparation
- Remove the butter and egg from the fridge 30–60 minutes before you start.
- If the butter is cold, cut it into cubes and let it sit or microwave it until slightly softened.
Mixing
- In a large bowl, beat the softened butter and granulated sugar on medium speed for 2–3 minutes.
- Add the egg and extracts, mix until smooth.
- Fold in the strawberry gelatin.
Combining
- In a separate bowl, whisk together the flour, baking powder, and salt.
- Add the dry ingredients to the wet mixture until just combined.
- Portion and chill the dough balls in the refrigerator for at least 1 hour.
Baking
- Preheat the oven to 350°F (175°C).
- Place chilled dough balls on a baking sheet 2 inches apart.
- Bake for 11–13 minutes, until edges are just set and centers look underbaked.
- Press a chocolate kiss into the center of each cookie right after baking.
Finishing Touches
- Dust the cookies lightly with powdered sugar.
- Cool completely on a wire rack.