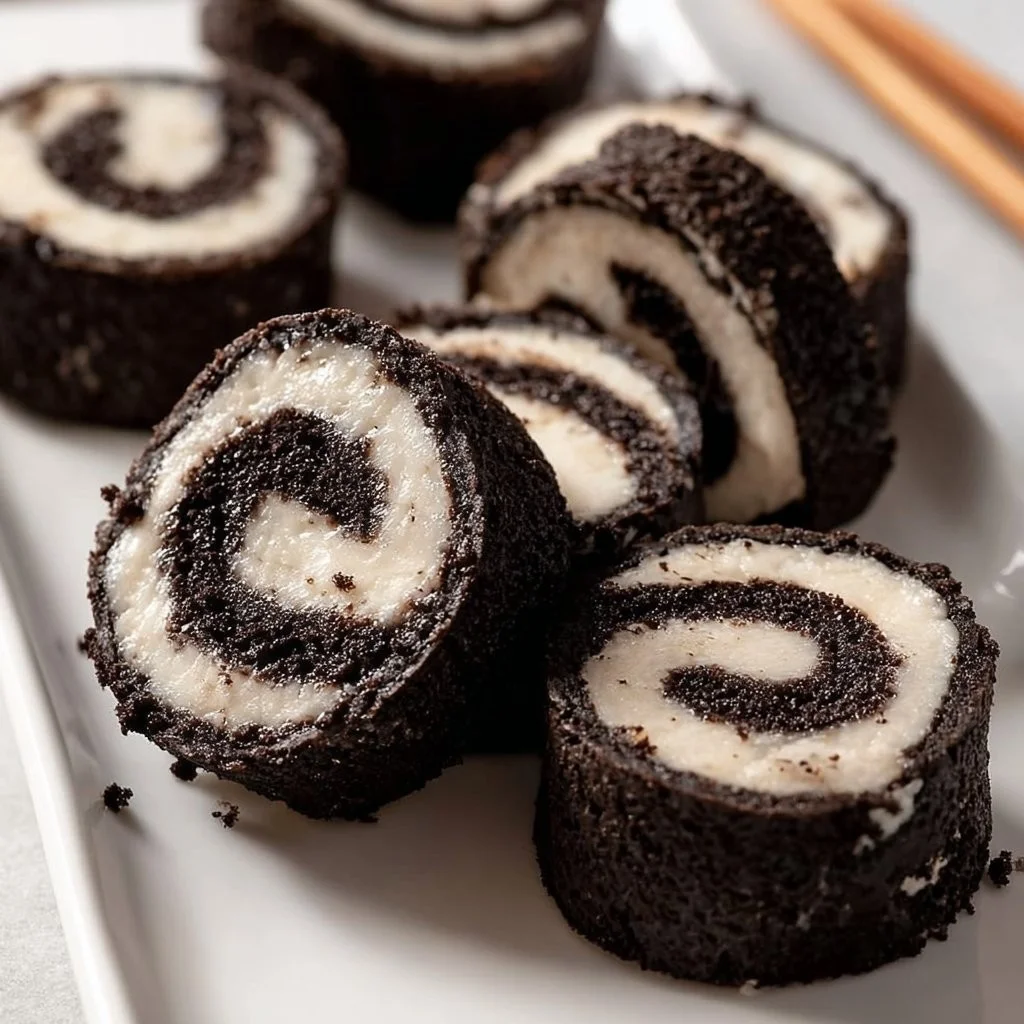
Oreo Sushi Rolls
After a long day of homework battles, late work emails, and the “what’s for dessert?” chorus, I keep a few recipes that rescue the evening without extra stress. Oreo Sushi Rolls are one of those fast, kid-approved treats that feel playful but require almost no effort. If you love Oreos, you might also enjoy my easy Oreo cheesecake for another quick sweet option the family will ask for again.
A Quick Look at This Oreo Sushi Rolls Recipe
Oreo Sushi Rolls take two ingredients both kids and adults adore — crushed Oreo cookies and a spreadable filling like Nutella or cream cheese — and turn them into bite-sized fun. This recipe is fast to assemble, needs minimal cleanup (one bowl, a sheet of parchment), and is make-ahead friendly for packed lunches or dessert trays. It’s forgiving: exact measurements aren’t crucial and picky eaters can customize each roll. Try it when you want a fast, reliable sweet that feels special but doesn’t eat into your evening.
Ingredients You’ll Need for Oreo Sushi Rolls
Essentials
- Oreo cookies (regular or Double Stuf) — about 20–30, depending on how many rolls you want.
- Filling of choice — examples: Nutella, cream cheese sweetened slightly with powdered sugar, or marshmallow fluff.
- Parchment paper or plastic wrap — for rolling and chilling.
- Optional: a little milk or softened butter (1–2 tablespoons) to help bind the crumb if needed.
These are pantry-friendly, kid-friendly items you can usually grab without a second trip to the store.
Optional Add-ons
- Chocolate chips or a melted chocolate drizzle for finishing.
- Fresh fruit slices (strawberries, bananas) for rolling or topping.
- Sprinkles for a party-ready look.
- Shredded coconut or crushed peanuts for texture (check for nut allergies).
- Mini M&Ms or crushed candy for color and crunch.
These add-ons let you tailor each roll to family preferences without complicating the basic method.
Substitutions and Shortcuts
- Swap Nutella for peanut butter or any seed butter if your household prefers it.
- Use a store-bought cookie butter spread as an all-in-one binder and filling.
- For a lighter option, use whipped cream cheese or a yogurt-based spread.
- If you want a softer dough fast, add 1–2 tablespoons of milk or softened butter to the crushed Oreos and mix until it holds together.
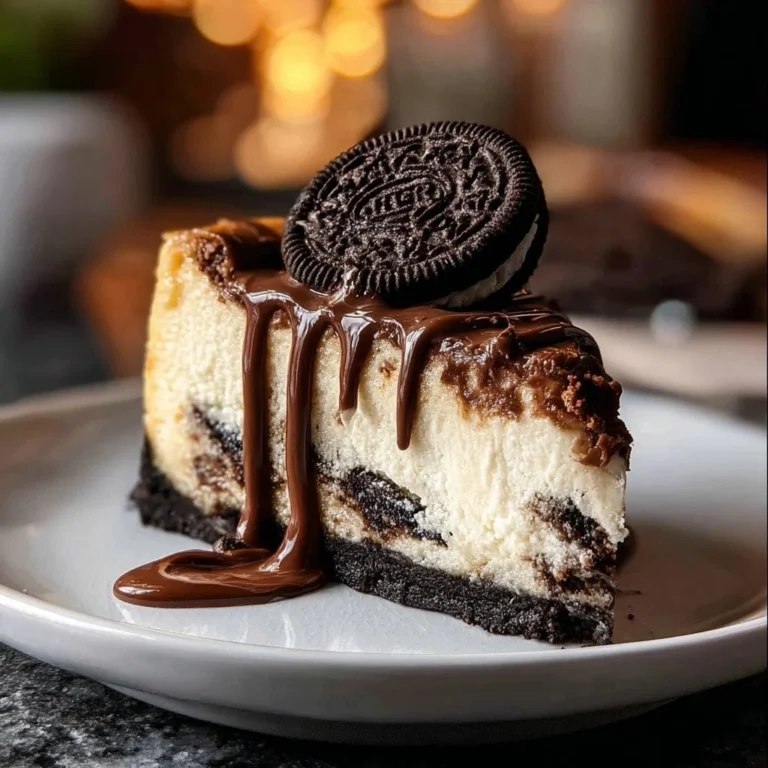
- To simplify cleanup and skip a step, use pre-crushed cookie crumbs from the baking aisle or a food processor bowl you’ve already used for another recipe. I sometimes adapt this into a larger dessert like my one-pot Oreo white chocolate cheesecake when I need a single-dish dessert for guests.
These swaps keep the recipe flexible for time, taste, and what’s already in your pantry.
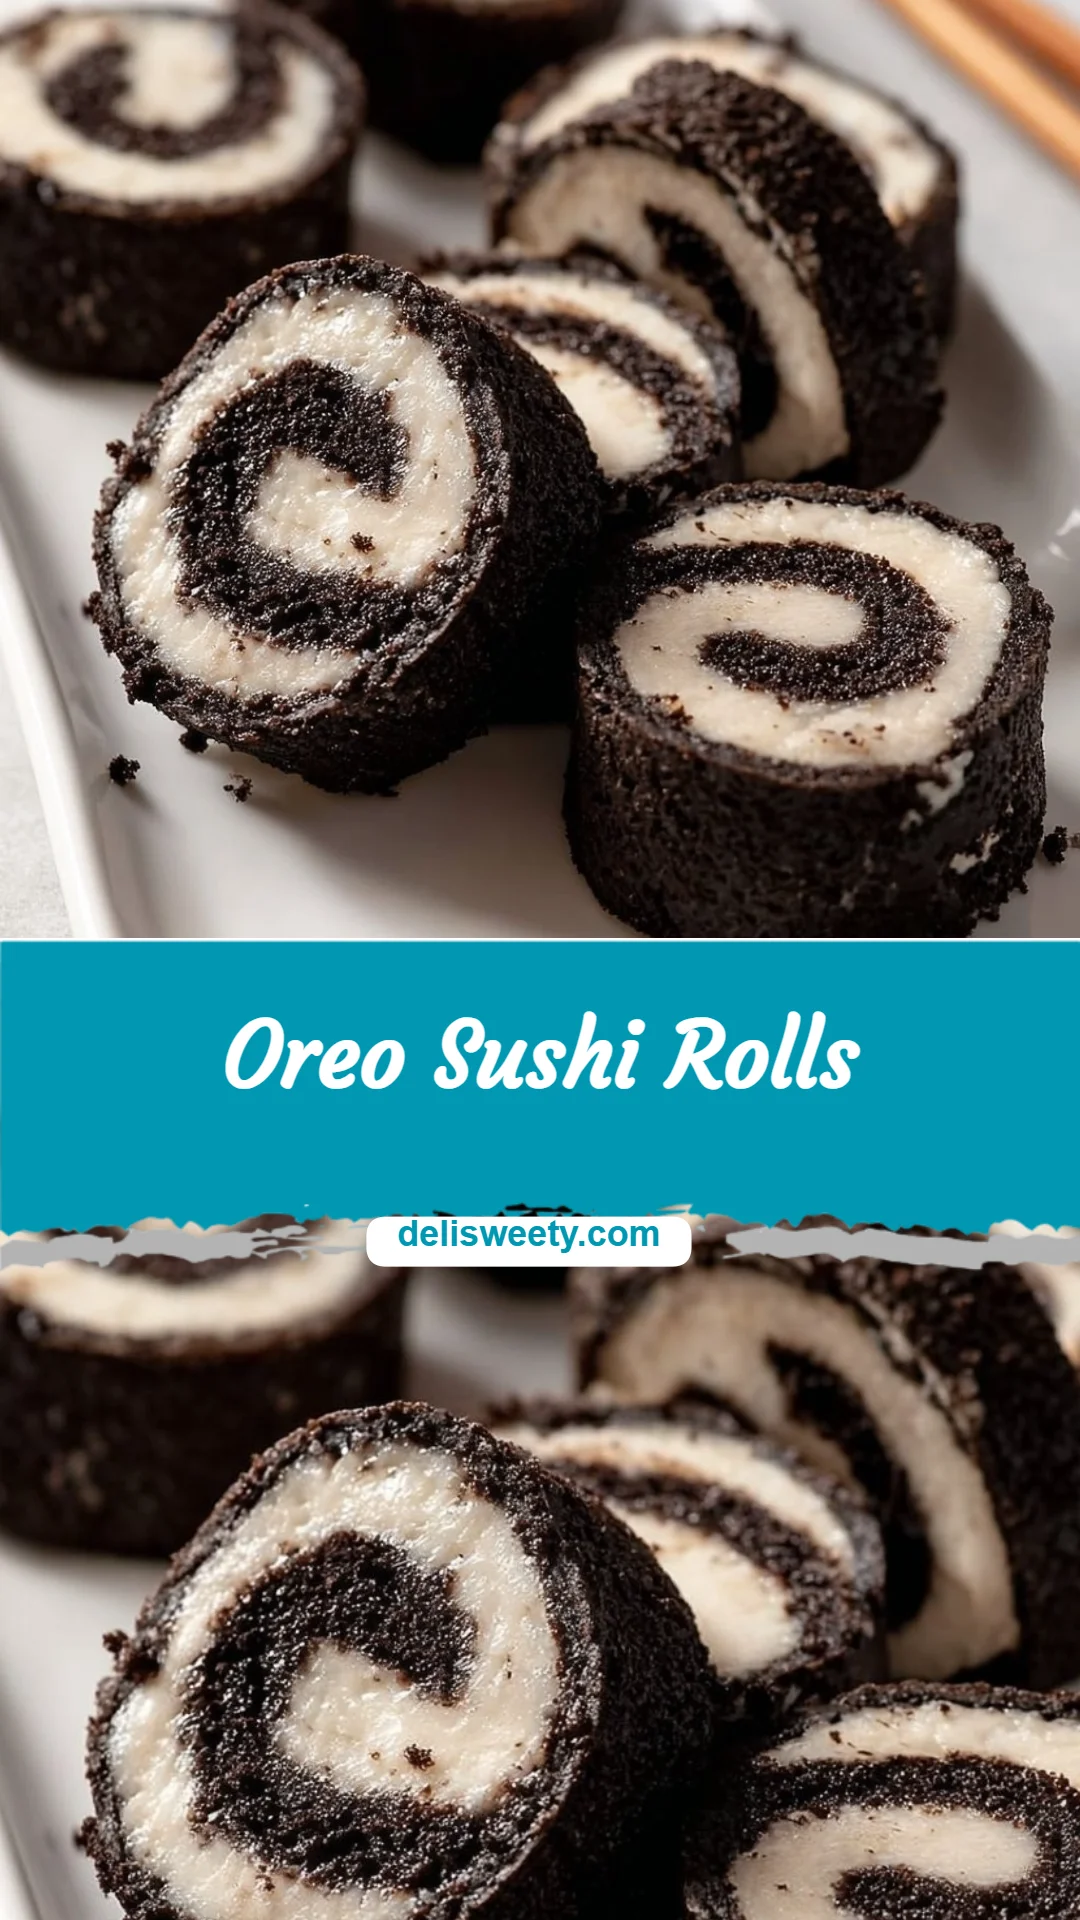
How to Make Oreo Sushi Rolls Step-by-Step
- Crush the Oreos into fine crumbs: place cookies in a zip-top bag and bash with a rolling pin, or pulse briefly in a food processor. No need for perfect uniformity — a few small chunks add nice texture.
- Mix crumbs with your filling: scoop your spreadable filling into the crumbs and stir until the mixture sticks together into a dough. Add a tablespoon of milk or softened butter if it seems too dry. I usually aim for a play-dough texture so it’s easy to roll.
- Flatten the dough on parchment: press the cookie dough between two pieces of parchment paper and roll it into an even rectangle about 1/4-inch thick. This keeps the pan clean and cuts down on dishes.
- Spread your inner filling: evenly layer whatever filling you chose (Nutella, fruit spread, cream cheese mixture) across the dough, leaving a small border at one long side so it seals when rolled. Be generous but not sloppy — a thin, even layer works best.
- Roll tightly like sushi: using the parchment to guide you, roll the dough up from the long edge into a tight log. Keep it snug but don’t worry about perfection — the chill step firms everything.
- Wrap and chill: wrap the log in parchment (or plastic) and refrigerate at least 30 minutes. This firms the roll for clean slicing and helps flavors meld. You can chill longer or freeze for short-term storage.
- Slice and serve: remove the wrap, slice into bite-sized pieces with a sharp knife, and arrange on a plate. Add optional toppings like a drizzle of melted chocolate or a few fruit slices before serving.
I promise these steps are forgiving — if your roll isn’t perfectly round, it still tastes amazing. Clean-up stays small because you can do most work on parchment or in one bowl.
Common Mistakes to Avoid
Keeping weeknights simple is about avoiding little traps that slow you down or create extra work. Here’s how I skip the stress and keep the dessert line moving.
Mistake 1: Using too much filling
Too much gooey filling makes rolling messy and spreading uneven. Keep a thin, even layer and leave a little edge so the log seals cleanly.
Mistake 2: Skipping the chill
Not chilling the log before slicing leads to squashed pieces and sticky fingers. A quick 30 minutes in the fridge firms the roll so slices come out neat.
Mistake 3: Over-crushing the Oreos
Turning the crumb into powder makes a dry dough that’s hard to bind. Aim for fine crumbs with a few tiny chunks for texture and better binding with your filling.
Serving Suggestions for Oreo Sushi Rolls
They’re perfect as a quick sweet finish or snack. Here are easy, kid-friendly ways I like to serve them with minimal fuss.
Kid-Friendly Sides
Pair Oreo Sushi Rolls with simple sides like apple slices, banana halves, or a small cup of yogurt. Fruits add freshness and a little balance to the sweet treat.
Easy Add-Ons
Keep a few quick add-ons on hand: a small bowl of warm chocolate for dipping, a jar of sprinkles for decorating, or a handful of nuts (if no allergies) for crunch. These are fast to set out and let kids customize.
Minimal Prep Pairings
Serve with a cold glass of milk, a small scoop of vanilla ice cream, or a dollop of whipped cream. These take seconds to plate and feel more special than a lone cookie.
Conclusion
I love how Oreo Sushi Rolls save time and still feel festive — they require minimal ingredients, almost no clean-up, and are incredibly easy to adapt for picky eaters. Whether you make them for a rushed after-school snack, a low-effort dessert for dinner, or a do-ahead treat for a party, they fit into real family schedules without the fuss. If you want another variation or inspiration, check out this detailed take on the idea at Oreo Sushi recipe on I Am A Food Blog. I hope you and your family enjoy them — make a batch, let everyone pick their topping, and give yourself a small win tonight.
FAQs About Oreo Sushi Rolls
Oreo Sushi Rolls keep well for 3–4 days refrigerated when wrapped tightly in plastic or stored in an airtight container. I slice them just before serving for the best texture, but they’re still tasty straight from the fridge.
Yes, you can freeze the wrapped log for up to 1 month. Thaw in the fridge for a few hours before slicing. Freezing is great when I make extras ahead for busy weeks.
Absolutely — they’re one of my go-to customizable treats. Let picky eaters choose their filling (Nutella, plain cream cheese, or a fruit spread) and toppings. The base flavor is familiar, so kids are more likely to try something new when it’s presented like this.
Active prep is about 10–15 minutes. Add a minimum of 30 minutes chilling time for clean slicing. I usually plan for about 45 minutes total so I’m not rushed and the rolls slice nicely.
Yes — crush the Oreos in a zip-top bag with a rolling pin or a small saucepan. It’s simple and cleans up quickly, which I love on busy nights.

Oreo Sushi Rolls
Ingredients
Essentials
- 20-30 pieces Oreo cookies (regular or Double Stuf) Depending on how many rolls you want.
- 1 cup Filling of choice (Nutella, cream cheese, marshmallow fluff) Sweetened cream cheese can be made with powdered sugar.
- 1 sheet Parchment paper or plastic wrap For rolling and chilling.
- 1-2 tablespoons Milk or softened butter To help bind the crumb if needed.
Optional Add-ons
- 1 cup Chocolate chips or melted chocolate drizzle For finishing.
- 1 cup Fresh fruit slices (strawberries, bananas) For rolling or topping.
- Sprinkles For a party-ready look.
- 1 cup Shredded coconut or crushed peanuts Check for nut allergies.
- 1 cup Mini M&Ms or crushed candy For color and crunch.
Instructions
Preparation
- Crush the Oreos into fine crumbs: place cookies in a zip-top bag and bash with a rolling pin, or pulse briefly in a food processor.
- Mix crumbs with your filling: scoop your spreadable filling into the crumbs and stir until the mixture sticks together into a dough.
- Flatten the dough on parchment: press the cookie dough between two pieces of parchment paper and roll it into an even rectangle about 1/4-inch thick.
- Spread your inner filling: evenly layer your chosen filling across the dough, leaving a small border at one long side.
- Roll tightly like sushi: using the parchment to guide you, roll the dough up from the long edge into a tight log.
- Wrap and chill: wrap the log in parchment (or plastic) and refrigerate for at least 30 minutes.
- Slice and serve: remove the wrap, slice into bite-sized pieces with a sharp knife, and arrange on a plate.