Valentine’s Day Truffles
I remember the first time I tasted a truffle that felt like a soft, luminous cloud—sweet, buttery white chocolate melting into a whisper of citrus and crunch. If the idea of making something that refined at home makes you hesitate—because of time, tempering chocolate, or technique—I promise these Valentine’s Day Truffles deliver that luxe moment without the fuss. They come together with pantry-friendly ingredients, straightforward steps, and a few optional finishing touches that let you tailor them to the person you love most (or to yourself). For an extra celebration-ready pairing, I sometimes set a small plate beside my cookies—see my thoughts on playful dessert pairings at iced birthday cake cookies.
A Quick Look at This Valentine’s Day Truffles Recipe
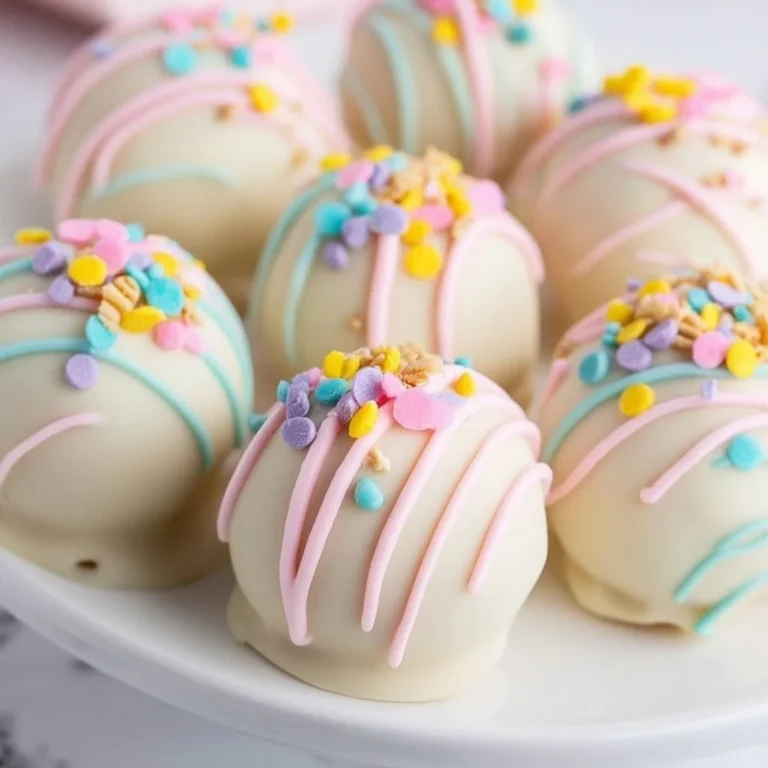
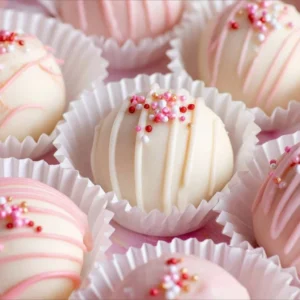
These Valentine’s Day Truffles are built on two standout ingredients: creamy white chocolate and the sunny, buttery crunch of Golden Oreos. The softened cream cheese binds the crumbs into a silky ganache-like center that’s rolled into satin-smooth balls and dipped in glossy white chocolate. The result is a truffle that reads both delicate and indulgent—perfect for gifting or a romantic dessert plate. They look spectacular with a simple sprinkle, a dusting of freeze-dried strawberry, or a brushed swipe of colored cocoa butter, and they come together fast enough for last-minute celebrations.
Ingredients You’ll Need for Valentine’s Day Truffles
Essentials
- 1 cup white chocolate chips — Choose high-quality chocolate with a high cocoa butter content for a silkier coating and deeper flavor.
- 1 cup Golden Oreos, crushed — The lemon-vanilla notes of Golden Oreos give these truffles a bright foundation; crush to a fine crumb for best texture.
- 4 oz cream cheese, softened — Full-fat cream cheese gives the centers a rich, tender mouthfeel; soften it to room temperature so it blends without lumps.
- Sprinkles, for decoration — Small nonpareils or heart-shaped sprinkles add a festival-ready finish and contrast to the white surface.
Optional Add-ons
- Finely grated lemon zest — A whisper of lemon zest livenes the white chocolate, lifting the richness.
- Vanilla bean paste or high-quality vanilla extract — Adds depth and a fragrant backbone to the white chocolate mixture.
- White chocolate curls or gold leaf — For an elevated, restaurant-style finish.
- Crushed freeze-dried strawberries — A vivid pink dust that adds color, a tart pop, and an elegant contrast.
- Toasted almond or hazelnut crumbs — For crunch and an earthy note that pairs beautifully with white chocolate.
- Edible glitter or colored cocoa butter — For dramatic sheen or brush-stroke decoration on the coated truffles.
Substitutions and Shortcuts
- White chocolate chips → White couverture or baking chocolate: If you can source couverture, it melts silkier and sets with a glossier finish; otherwise, chips work perfectly when tempered with gentle care.
- Golden Oreos → Vanilla wafer cookies or graham crackers: Use the same volume once crushed; cookies with a buttery profile keep the texture similar.
- Cream cheese → Mascarpone: For a creamier, slightly less tangy center, use mascarpone in equal measure.
- Sprinkles → Shaved freeze-dried raspberry or cocoa dust: If you want a more refined topping, switch sprinkles for a dusting of raspberry powder or a mix of finely chopped toasted nuts.
- No food processor? No problem — place cookies in a resealable bag and crush with a rolling pin until very fine.
How to Make Valentine’s Day Truffles Step-by-Step
I design this method to be calm and encouraging: you’ll move deliberately through straightforward steps and finish with truffles that look like they were made in a patisserie.
Chill your workspace and tools. Line a baking sheet with parchment paper and set it in the refrigerator (or freezer) while you work. A chilled sheet helps the truffles firm up quickly after forming, keeping their shape neat and tidy.
Grind the cookies to a fine crumb. Pulse the Golden Oreos in a food processor until they resemble fine sand. If you don’t have a processor, place them in a sturdy zip-top bag, press out the air, and roll with a pin until finely crushed. The finer the crumbs, the silkier your centers will be.
Combine crumb and cream cheese. In a mixing bowl, add the cookie crumbs to the softened cream cheese and, if using, a teaspoon of vanilla or a scant half teaspoon of vanilla bean paste. Use a spatula or the paddle attachment of a mixer on low speed to blend until the mixture is smooth and uniform—no visible streaks of cream cheese. This step creates the base texture for your truffles.
Melt the white chocolate gently. Warm the white chocolate chips in 20–30 second bursts in the microwave, stirring between each interval, until just melted and glossy. Alternatively, melt in a double boiler over barely simmering water, stirring frequently. Avoid overheating; white chocolate can seize easily. If it’s too thick, stir in a teaspoon of neutral oil (grapeseed) or a small splash of cream to bring it to a silky pouring consistency.
Fold the chocolate into the cookie mixture. Pour the melted white chocolate into the cookie-and-cream cheese mixture and fold with a flexible spatula until thoroughly combined. You want a cohesive, scoopable dough that holds together when pressed. If you’re adding lemon zest or additional flavorings, fold them in here.
Shape the truffles. Use a small cookie scoop (about 1 tablespoon) or a heaping teaspoon to portion the mixture, then roll quickly between your palms into smooth spheres. Wetting your hands with a light mist of water or lightly oiling them helps if the mixture sticks. Place each finished ball on the chilled parchment-lined sheet.
Firm the centers. Chill the formed truffles for at least 30 minutes, or until they’re firm to the touch. This step ensures they keep their shape when you dip them in the coating.
Coat with white chocolate and decorate. Reheat any reserved melting chocolate, or melt additional white chocolate for coating. Using a fork or dipping tool, lower each truffle into the warm chocolate, tap off excess, and set back onto the parchment. Immediately sprinkle with decorative toppings—sprinkles, freeze-dried strawberry dust, toasted nuts, or edible glitter—before the coating sets.
Let them fully set. Allow the coated truffles to finish setting at room temperature for a glossy finish, or chill briefly to speed the process if your kitchen is warm. Setting in the refrigerator can cause tiny condensation spots if you later return them to room temperature, so if you want the absolute best sheen, let them set at cool room temperature.
Store with care. Layer the truffles in an airtight container separated by parchment or wax paper and refrigerate for up to 7 days. Bring them to a slightly warmer temperature (10–15 minutes at room temp) before serving so their texture feels soft and luxurious on the tongue.
Common Mistakes to Avoid
Mistakes are simply ways to learn what each step contributes to the final truffle. A few mindful adjustments will keep your centers silky, your coatings glossy, and your presentation polished.
Mistake 1: Overheating the white chocolate
White chocolate burns quickly and becomes grainy when overheated. I warm it slowly and stir often, stopping as soon as it’s smooth. If it thickens or seizes, a teaspoon of neutral oil or warm cream whisked in gently can rescue it.
Mistake 2: Using cold cream cheese
Cold cream cheese doesn’t blend smoothly and leaves lumps in the truffle centers. Always bring it to room temperature so it incorporates beautifully with the cookie crumbs and melted chocolate.
Mistake 3: Dipping before the centers are firm
If you dip centers that are still soft, they may deform or fall apart in the coating. Chill the rolled truffles until firm—this gives you clean, round shapes and a professional finish.
Serving Suggestions for Valentine’s Day Truffles
A few simple touches make these truffles feel ceremonious: thoughtful plating, a balance of textures, and pairing notes that highlight their sweet, creamy character.
I like to present truffles on a small white plate or slate, paired with a texture or color contrast—think tiny pools of crushed freeze-dried strawberry or scattered toasted nut crumbs. Keep the presentation minimal so each truffle remains the star.
Elegant Plating
Place truffles in neat rows or a loose cluster on plain white porcelain. A light dusting of powdered freeze-dried strawberry around the edge of the plate creates an intentional frame and a subtle tartness to cut the sweetness.
Freshness and Texture Pairing
Serve alongside fresh citrus segments (blood orange or clementine) or a small spoon of black currant or raspberry compote. The bright acidity balances the creamy white chocolate and complements the Golden Oreo’s vanilla notes.
Gift and Party Presentation
Nestle truffles in mini paper cups for gifting, and stack them in a small tin or box with parchment layers. Add a sprig of edible flowers or a thin ribbon for a romantic touch—these little details transform homemade sweets into a keepsake.

Conclusion
I believe these Valentine’s Day Truffles prove that restaurant-worthy confections can be made in a home kitchen without tempering drama or exotic ingredients—just attention to texture, temperature, and a few elegant finishes. They’re wonderfully adaptable: swap in toasted nuts, a whisper of lemon zest, or a blush of crushed freeze-dried strawberries to make them your own. If you’d like another take on homemade truffles for your celebration, I also find inspiration in recipes such as Valentine’s Day Homemade Chocolate Truffles – My Farmhouse Table which offer complementary techniques and presentation ideas. When you make a batch, savor the ritual of shaping and decorating—these are the moments that turn a simple recipe into a cherished memory.
FAQs About Valentine’s Day Truffles
Valentine’s Day Truffles keep well for up to 7 days when stored in an airtight container in the refrigerator. For the best texture, allow them to sit at room temperature for 10–15 minutes before serving so the centers soften slightly.
Yes—you can freeze the truffles for up to 3 months. Arrange them in a single layer on a tray to flash-freeze, then transfer to an airtight container with parchment layers. Thaw in the refrigerator overnight and bring to room temperature before serving to avoid condensation on the coating.
Absolutely. You can prepare the centers up to 2 days in advance and keep them chilled. Coat and decorate on the day you plan to serve for the freshest finish, or fully assemble and then chill for a ready-to-serve option.
For a polished look, use tempered white chocolate or add a thin spoonful of cocoa butter paint for brush-stroke decoration. Pressing a single edible gold leaf or a delicate white chocolate curl on top gives an immediate boutique patisserie feel.
Yes. Place the Golden Oreos in a heavy-duty zip-top bag, remove the air, and crush them with a rolling pin until very fine. This manual method gives you control over texture and produces excellent results for the truffle centers.
Valentine’s Day Truffles
Ingredients
Essentials
- 1 cup white chocolate chips Choose high-quality chocolate with a high cocoa butter content for a silkier coating and deeper flavor.
- 1 cup Golden Oreos, crushed The lemon-vanilla notes of Golden Oreos give these truffles a bright foundation; crush to a fine crumb for best texture.
- 4 oz cream cheese, softened Full-fat cream cheese gives the centers a rich, tender mouthfeel; soften it to room temperature so it blends without lumps.
- Sprinkles, for decoration Small nonpareils or heart-shaped sprinkles add a festival-ready finish and contrast to the white surface.
Optional Add-ons
- finely grated lemon zest A whisper of lemon zest livens the white chocolate, lifting the richness.
- vanilla bean paste or high-quality vanilla extract Adds depth and a fragrant backbone to the white chocolate mixture.
- white chocolate curls or gold leaf For an elevated, restaurant-style finish.
- crushed freeze-dried strawberries A vivid pink dust that adds color, a tart pop, and an elegant contrast.
- toasted almond or hazelnut crumbs For crunch and an earthy note that pairs beautifully with white chocolate.
- edible glitter or colored cocoa butter For dramatic sheen or brush-stroke decoration on the coated truffles.
Instructions
Preparation
- Chill your workspace and tools. Line a baking sheet with parchment paper and set it in the refrigerator (or freezer) while you work.
- Grind the cookies to a fine crumb by pulsing the Golden Oreos in a food processor. Alternatively, crush them in a resealable bag using a rolling pin.
- Combine the cookie crumbs with the softened cream cheese and vanilla (if using) in a mixing bowl and blend until smooth.
- Melt the white chocolate gently in the microwave or over a double boiler and stir until glossy.
- Fold the melted chocolate into the cookie and cream cheese mixture until well combined.
- Use a small scoop or spoon to portion the mixture and roll it into smooth spheres, placing them on the chilled baking sheet.
- Chill the formed truffles for at least 30 minutes until firm.
Coating
- Reheat the melting chocolate if needed and use a fork to dip each truffle into the chocolate, letting excess drip off.
- Immediately sprinkle with decorative toppings before the coating sets.
Finishing
- Allow the coated truffles to set at room temperature or chill briefly to speed the process.
- Store the truffles in an airtight container in the refrigerator for up to 7 days.