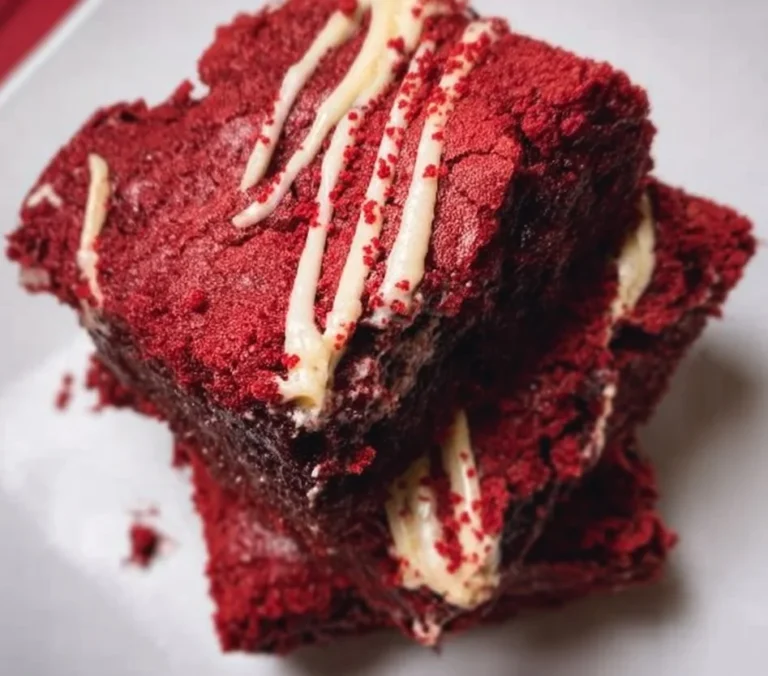
Rice Krispy Millionaires Bars
There’s something about the smell of melting marshmallows and chocolate that takes me straight back to lazy afternoons and sticky fingers—maybe you’ve had that same craving after seeing a bakery window or a childhood bake sale. If you’re a beginner who worries about tricky caramel stages or perfect chocolate tops, breathe easy: this Rice Krispy Millionaires Bars recipe is forgiving, cozy, and actually one of the easiest layered treats you’ll make at home. If you love exploring more dessert bars, I also sometimes round up other delicious cookie and bar recipes that pair nicely with these.
A Quick Look at This Rice Krispy Millionaires Bars Recipe
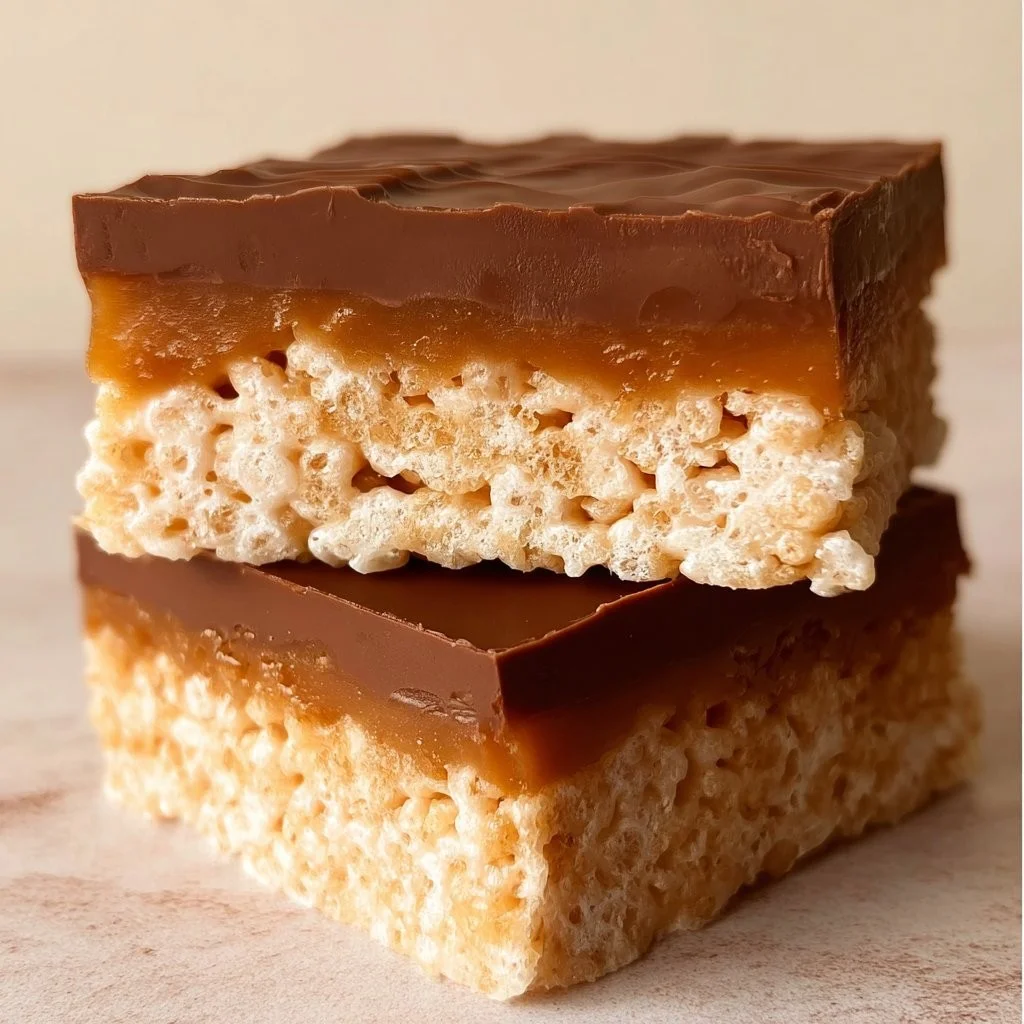
Rice Krispy Millionaires Bars are built on two star ingredients: puffed rice cereal (Rice Krispies) and a soft, buttery caramel made with condensed milk. They’re convenience-forward—no yeast, no long proofing, just stovetop melting and gentle cooking—so you get a rich, indulgent treat without a long time in the kitchen. Great for home cooks and absolute beginners because the base and topping are simple melts, and the caramel is a one-pan, stir-and-watch process. Scroll down to see step-by-step tips that make the caramel foolproof and to learn quick variations to suit your family’s tastes.
Ingredients You’ll Need for Rice Krispy Millionaires Bars
Essentials
- 65g unsalted butter (for the Rice Krispie base)
- 230g mini marshmallows
- 110g Rice Krispies cereal (or any puffed rice cereal)
- 90g unsalted butter (for the caramel)
- 100g light brown sugar
- 1 tin (397g) sweetened condensed milk
- 1 tbsp golden syrup (or corn syrup if unavailable)
- 1/2 tsp salt (fine)
- 250g milk chocolate (for the topping)
- 15g unsalted butter (for a glossy chocolate top)
These are the core ingredients that create the tri-layer effect: a crisp marshmallow base, a chewy caramel middle, and a glossy chocolate cap.
Optional add-ons
- A pinch of flaky sea salt sprinkled on top of the chocolate for a sweet-salty contrast.
- 1/2 tsp vanilla extract stirred into the caramel for extra depth.
- A handful (30–40g) of chopped toasted nuts like pecans or hazelnuts pressed into the caramel while still warm.
- For a cocoa hit, swap 50g of milk chocolate for dark chocolate in the topping.
- Mini chocolate chips pressed into the top before the chocolate sets for texture.
These extras are optional but make lovely twists if you’re feeling adventurous.
Substitutions and shortcuts
- Butter: You can use slightly less salted butter if that’s what you have; reduce added salt by half.
- Golden syrup: Use light corn syrup or a mild honey (honey will change flavor slightly).
- Condensed milk: This is the quickest way to make a thick caramel; you can make a stovetop caramel from cream and sugar, but it’s more time-consuming and trickier for beginners. I recommend sticking to the condensed milk method for ease.
- Marshmallows: If you can only find large marshmallows, measure by weight and chop them roughly so they melt evenly.
- Rice Krispies: Any puffed rice cereal works. If you want more chew, mix half puffed rice, half crispy oat cereal.
- Chocolate: If you don’t have a block of chocolate, use good-quality chocolate chips. For a fudgier top, use a higher milk-to-cocoa ratio.
If you’re short on time, a key shortcut is to use a microwave for the base step: melt butter and marshmallows in 20–30 second bursts, stirring between each burst until smooth.
How to Make Rice Krispy Millionaires Bars Step-by-Step
I know layered bars can feel intimidating if you’re new to caramel, but I’ll walk you through every step so you feel confident. Take your time, use medium-low heat, and keep a bowl of cold water nearby for the soft-ball test.
Step 1 — Prepare equipment and pan
Line an 8×8” or 9×9” baking tin with baking paper, letting the paper overhang two sides to make removal easier. I like to lightly grease the tin first so the paper sits smooth without slipping. Have a wooden spoon or heatproof spatula ready, and keep a small bowl of cold water beside the stove for testing the caramel later.
Step 2 — Make the marshmallow Rice Krispie base
Place 65g unsalted butter in a medium saucepan over low heat. When the butter has melted, add 230g mini marshmallows. Stir continuously with a heatproof spatula as the marshmallows slowly melt into the butter. Keep the heat low—marshmallows scorch easily. Once the mixture is glossy and smooth with no lumps, remove the pan from the heat.
Immediately add 110g Rice Krispies cereal to the melted marshmallow mixture. Use a folding motion to coat the cereal evenly; try not to over-stir or smash the cereal too much—gentle but thorough mixing keeps the bars light and crisp. Transfer the mixture to your lined tin. Press the mixture down evenly and firmly into the base using the back of a spoon or a greased spatula. Don’t press so hard that you compact the cereal too much—just enough to create a stable foundation. Set the tin aside while you make the caramel.
Step 3 — Start the caramel
In a clean, heavy-bottomed saucepan, melt 90g unsalted butter over medium-low heat. Once melted, add 100g light brown sugar, the whole tin of condensed milk (397g), 1 tablespoon golden syrup, and 1/2 teaspoon salt. Stir constantly with a wooden spoon or heatproof spatula to prevent scorching. The mixture will be thin at first and will slowly thicken as the sugar dissolves and the condensed milk cooks.
Step 4 — Cook to the soft-ball stage (or desired thickness)
Continue stirring the caramel mixture over medium-low heat. Patience is the key: keep the heat under control and stir gently but continuously. To tell when it’s ready, use the cold water soft-ball test: drop a small spoonful into the bowl of cold water. If it forms a soft, pliable ball that flattens when removed, it’s at the soft-ball stage—this usually takes about 10–15 minutes but can vary by stove. The caramel should be thick enough to coat the back of the spoon and pull away cleanly from the pan.
If you prefer a firmer, less gooey caramel, cook a little longer until the mixture reaches a slightly higher temperature or until a firmer ball forms in the water test. Remember: it will thicken further as it cools, and slightly overcooking can make it brittle, so aim for soft-ball for the classic chewy texture.
Step 5 — Pour the caramel over the base
When the caramel is ready, immediately pour it evenly over the pressed Rice Krispie base. Use a spatula to smooth it out quickly—work while it’s warm because the caramel sets as it cools. Allow the tin to sit at room temperature until the caramel layer firms up. This can take about 1–2 hours; if you’re in a hurry, you can chill the tin briefly in the fridge for 20–30 minutes, but I recommend not leaving it too long in the fridge to avoid losing the Rice Krispies’ crispness.
Step 6 — Make the chocolate topping
Once the caramel is set to the touch but still cool, break 250g milk chocolate into pieces and place them in a heatproof bowl with 15g unsalted butter. Melt gently either over a bain-marie (a bowl over a pan of simmering water) or in the microwave in short 20–30 second bursts, stirring between each burst until smooth and glossy. If using the microwave, stop while a few unmelted pieces remain and stir until they melt in the residual heat to avoid overheating the chocolate.
Step 7 — Top and set
Pour the melted chocolate over the cooled caramel layer and spread it evenly with an offset spatula or the back of a spoon. If you like flaky salt, sprinkle a pinch over the chocolate now. Let the chocolate set at room temperature until firm. If your kitchen is warm, place the tin in the fridge for 10–20 minutes to speed setting, but don’t chill too long or the Rice Krispies can lose their crunch.
Step 8 — Cut and serve
Use the overhanging baking paper to lift the whole slab from the tin. Place it on a cutting board and use a sharp knife to slice into bars. For cleaner edges, warm the knife under hot water and wipe it dry between cuts. Store the bars in an airtight container at room temperature for up to 4 days—if your home is hot, keep them in the fridge but let them come to room temperature before serving for best texture.
Common Mistakes to Avoid
Even simple recipes have pitfalls—here are the ones I see most often and how to avoid them.
Mistake 1: Cooking caramel at too high heat
High heat scorches the bottom and can quickly take your caramel past the soft-ball stage. Use medium-low heat and stir continuously. If you smell burning or see dark specks, start over—bitter burnt sugar can’t be saved.
Mistake 2: Pressing the Rice Krispie base too firmly
Pressing the base with too much force makes the cereal dense and chewy rather than light and crispy. Press firmly enough to make a solid base but stop when it feels compacted, not compressed.
Mistake 3: Rushing the setting process
Pouring chocolate over caramel that’s still warm can cause the caramel to sink or mix into the chocolate. Wait until the caramel is cool to the touch. If you’re impatient, chill briefly—but don’t over-chill the base or the Rice Krispies will soften.
Serving Suggestions for Rice Krispy Millionaires Bars
These bars are wonderful on their own, but small serving tweaks can elevate them into a special dessert or gift.
Serve warm with tea or coffee
I love a slightly warm slice with a strong cup of coffee or a milky tea—the heat softens the chocolate and caramel slightly, making every bite indulgent.
Pack into gift boxes
Cut neatly and wrap bars individually in parchment for gift boxes. They’re a hit at bake sales and holiday gatherings and travel well if packed in a single layer.
Make a dessert plate
Slice a bar into smaller fingers and arrange with fresh berries and whipped cream for a shareable dessert plate that looks fancy with minimal effort.
(If you want more ideas for cookies and bars to make alongside these, check my collection of cookies and bars recipes for inspiration.)

Conclusion
I promise: Rice Krispy Millionaires Bars are easier than they look—three simple layers, predictable steps, and forgiving techniques make them perfect for anyone who’s new to caramel or layered treats. I love how customizable they are: swap nuts, add a salt finish, or use dark chocolate for a grown-up twist. If you’d like a different take or another creator’s technique, I sometimes compare variations—this recipe pairs nicely with ideas from Millionaires Rice Krispie Treats | Ash Baber and Millionaire’s Rice Krispies Treats | e2 bakes brooklyn. Happy baking—slice one for yourself right away and share the rest if you can resist them all!
FAQs About Rice Krispy Millionaires Bars
Yes. I often make them a day or two in advance. Store them in an airtight container at room temperature for up to 4 days. If your house is warm, refrigerate briefly, but allow bars to come to room temperature before serving for the best texture.
Absolutely. Wrap individual bars well in parchment and foil, then place in a freezer bag for up to 2 months. Thaw in the fridge or at room temperature. The texture is slightly different after freezing, but they still taste delicious.
You can make a caramel using cream and sugar instead, but it’s trickier and requires watching the caramel temperature closely. For beginners, condensed milk is the easiest and most reliable way to get that soft, chewy caramel.
Avoid over-chilling and keep the bars in an airtight container at room temperature when possible. Chilling for a short time to set the chocolate is fine, but long refrigeration absorbs moisture and softens the cereal.
Yes. Dark chocolate gives a richer, less sweet finish and pairs nicely with salted caramel. Replace all or half of the milk chocolate with dark to taste.

Rice Krispy Millionaires Bars
Ingredients
For the Rice Krispie base
- 65 g unsalted butter for the Rice Krispie base
- 230 g mini marshmallows
- 110 g Rice Krispies cereal or any puffed rice cereal
For the caramel
- 90 g unsalted butter for the caramel
- 100 g light brown sugar
- 1 tin sweetened condensed milk (397g)
- 1 tbsp golden syrup (or corn syrup if unavailable)
- 1/2 tsp fine salt
For the chocolate topping
- 250 g milk chocolate for the topping
- 15 g unsalted butter for a glossy chocolate top
Optional add-ons
- 1 pinch flaky sea salt for sprinkling on top
- 1/2 tsp vanilla extract for extra depth in the caramel
- 30-40 g chopped toasted nuts like pecans or hazelnuts pressed into the caramel while still warm
- 50 g dark chocolate to replace part of the milk chocolate in the topping
- 1 handful mini chocolate chips pressed into the top before the chocolate sets for texture
Instructions
Preparation
- Line an 8×8” or 9×9” baking tin with baking paper, letting the paper overhang two sides to make removal easier.
- Lightly grease the tin and have a wooden spoon or heatproof spatula ready.
- Keep a small bowl of cold water beside the stove for testing the caramel later.
Make the Rice Krispie base
- Melt 65g unsalted butter in a medium saucepan over low heat.
- Add 230g mini marshmallows and stir continuously until melted and smooth.
- Immediately fold in 110g Rice Krispies cereal until evenly coated.
- Transfer the mixture to the lined tin and press down gently to form a stable base.
Make the caramel
- Melt 90g unsalted butter in a clean, heavy-bottomed saucepan over medium-low heat.
- Add 100g light brown sugar, the tin of condensed milk, 1 tbsp golden syrup, and 1/2 tsp salt.
- Stir constantly until the mixture thickens and reaches the soft-ball stage.
Pour the caramel over the base
- When the caramel is ready, pour it over the pressed Rice Krispie base.
- Smooth it out quickly and let it set at room temperature for 1-2 hours.
Make the chocolate topping
- Melt 250g milk chocolate and 15g unsalted butter until smooth.
Top and set
- Pour the melted chocolate over the cooled caramel layer and spread evenly.
- Let the chocolate set until firm at room temperature.
Cut and serve
- Lift the whole slab out using the overhanging baking paper and cut into bars.