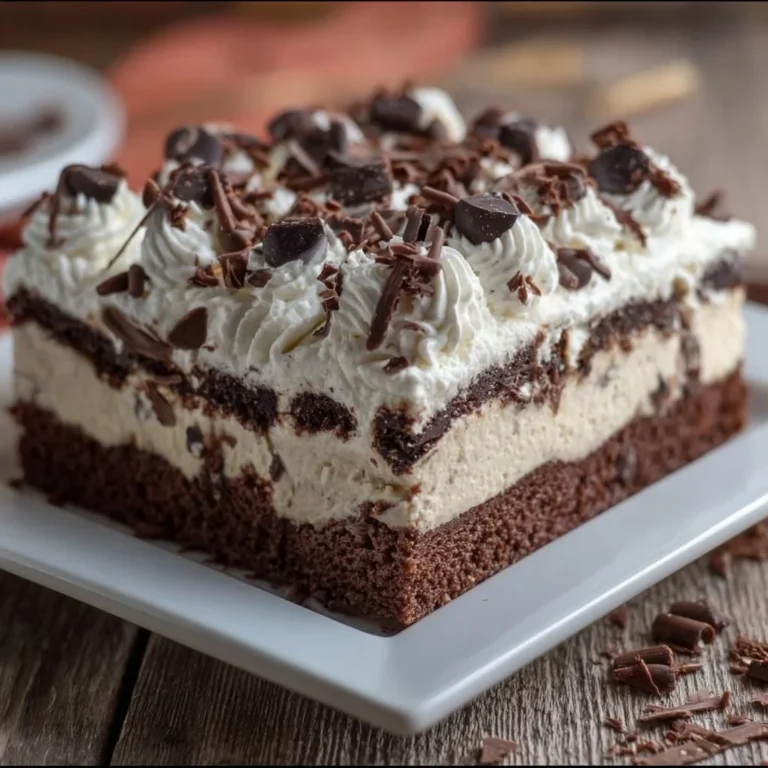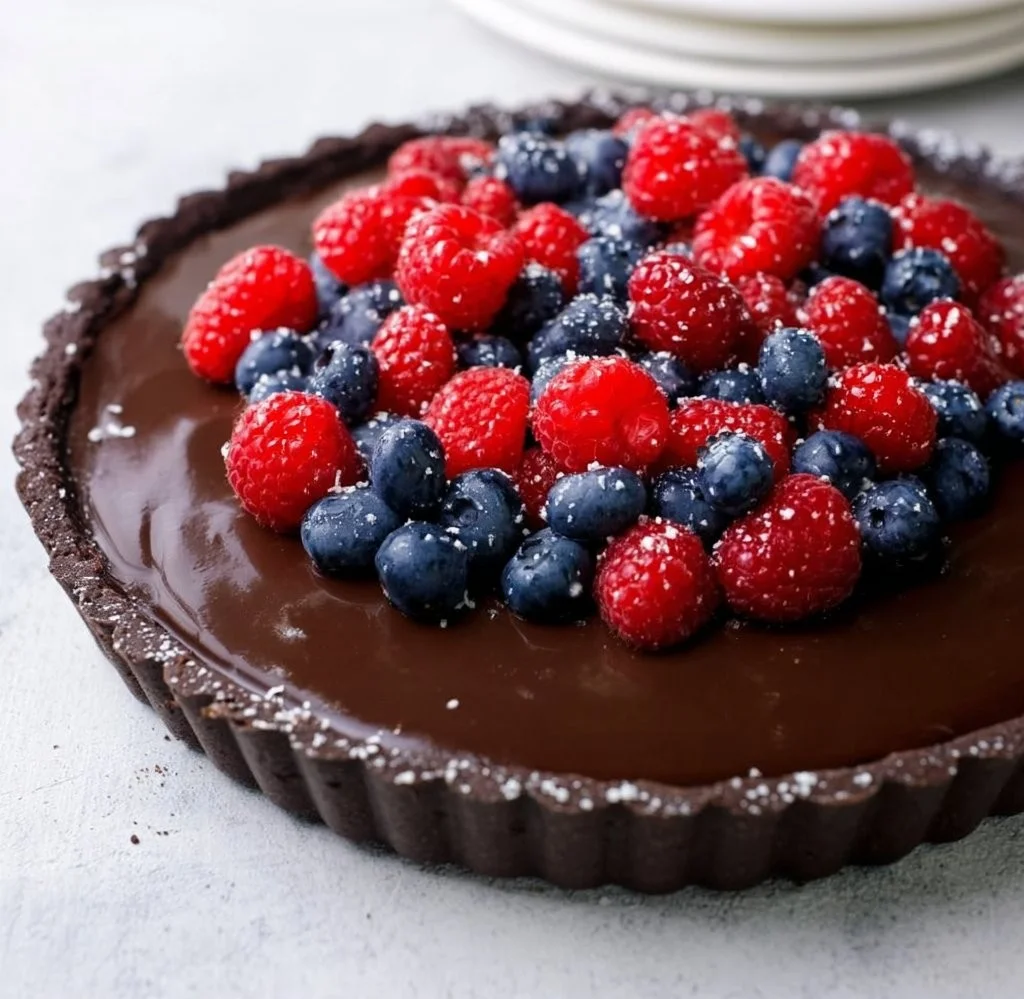
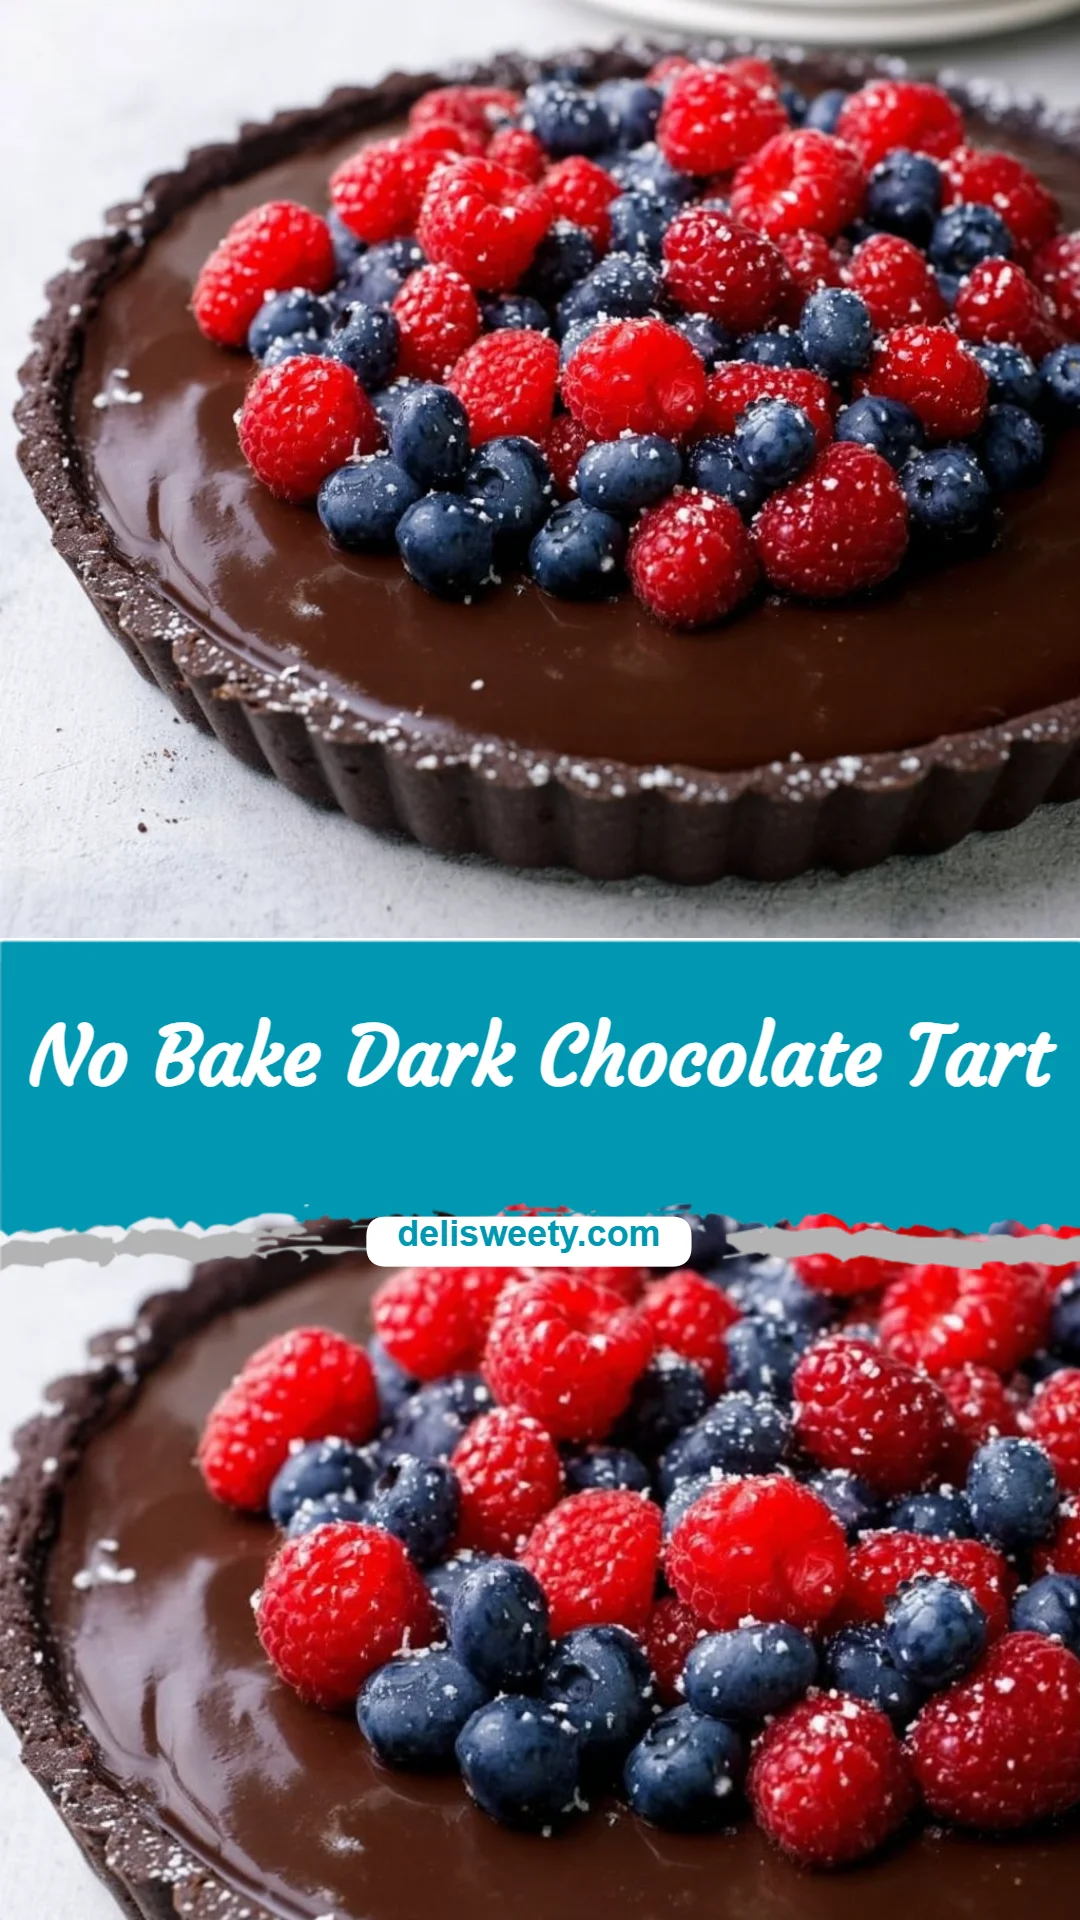
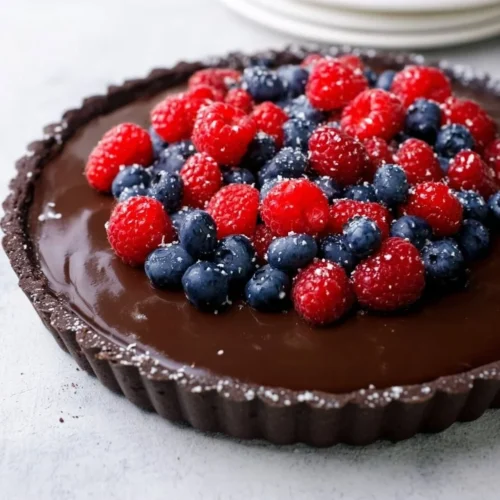
No Bake Dark Chocolate Tart
A late workday, after-school chaos, and a pair of tired parents staring into the fridge — I get it. When dessert needs to happen fast and everyone has different tastes, the No Bake Dark Chocolate Tart is my go-to: quick, forgiving, and almost universally loved. This recipe uses dark chocolate and Oreo cookies — two ingredients kids and adults smile at — and it cleans up in a flash, so you can get a sweet finish without staying in the kitchen. If you’re into easy family desserts, I also like keeping other no-bake options on hand, like 5-Ingredient No-Bake Crunchie Slice for times I want something even simpler.
A Quick Look at This No Bake Dark Chocolate Tart Recipe
This No Bake Dark Chocolate Tart pairs a crunchy Oreo crust with a silky dark chocolate filling kids and grown-ups both enjoy. It only needs a few pantry staples — cookies, butter, chocolate, and cream — and the filling comes together in one pan. The whole tart sets in the fridge, which means minimal oven time (none) and great make-ahead potential. It’s perfect for busy weeknights because you can assemble it after dinner, let it chill while you do homework and baths, and serve it with fresh berries for a pretty, family-approved finish. I promise — it’s easier than it looks and very reliable.
Ingredients You’ll Need for No Bake Dark Chocolate Tart
Below I break the ingredients into what you’ll definitely want on hand, small extras that elevate the tart, and swaps or shortcuts that save time when you’re short on energy.
Essentials
- 1 package Oreo cookies (about 9–10 ounces): crushed into fine crumbs for the crust
- 1/2 cup unsalted butter, melted: binds the crust, adds richness
- 1 1/2 cups dark chocolate, chopped (or high-quality chips): the star of the filling
- 1 cup heavy cream: creates the ganache-like filling
- 1 teaspoon vanilla extract: simple flavor lift
- Fresh berries (strawberries, raspberries, or blueberries) for topping: bright, family-friendly garnish
- Powdered sugar for light dusting before serving
These are all common grocery-store items. I keep Oreos and a bag of good dark chocolate on hand so this dessert is always an easy option.
Optional Add-ons
- A pinch of sea salt on the filling for grown-up balance
- A few crushed nuts (hazelnuts or toasted almonds) sprinkled on top for crunch
- A spoonful of peanut butter mixed into the crust for a chocolate-peanut combo kids love
- A smear of jam (raspberry or strawberry) between crust and filling for a tart contrast
These extras are totally optional and can be added if you want to dress the tart up without adding much time.
Substitutions and Shortcuts
- Crust shortcut: use store-bought chocolate cookie crust if you’re in a real hurry.
- Butter swap: if you prefer, use light olive oil (mild flavor) or a neutral oil, 3 tablespoons for 1/2 cup butter, but texture may vary.
- Chocolate options: use semi-sweet chips or a mix of dark and milk chocolate to please picky kids.
- Cream substitute: for a slightly lighter filling, use half-and-half, but set time may be a little longer.
- Make-ahead tip: press crust into the pan the night before and store covered in the fridge; add filling when you have 10 minutes.
- Kid-friendly twist: swap Oreos for a favorite sandwich cookie your kids already like.
If you want another no-bake bar-style idea with a different flavor profile, try a riff on 5-Ingredient No-Bake Lotus Biscoff Pie Bars for more inspiration during busy weeks.
How to Make No Bake Dark Chocolate Tart Step-by-Step
I keep these steps short and practical for busy parents. No exacting pastry techniques required — just straightforward moves.
Prep and crush the cookies. Put Oreo cookies in a zip-top bag and crush with a rolling pin, or pulse in a food processor until fine crumbs form. No processor? Just do it while helping with homework — it’s a quick multitask.
Mix crust and press into pan. Stir the crumbs with melted butter in a bowl until combined and press the mixture into the bottom and up the sides of a tart pan (9-inch tart pan works well). Press firmly but don’t obsess — an even layer is what matters.
Chill the crust briefly. Pop the crust into the fridge for 10–15 minutes while you heat the cream. This helps it set and makes pouring the filling less messy.
Heat the cream. In a small saucepan, heat the heavy cream over medium heat until it just begins to simmer (tiny bubbles at the edge). Don’t boil — simmering is enough.
Make the chocolate filling. Remove the cream from heat and immediately add the chopped dark chocolate and vanilla extract. Let sit 1 minute, then stir until smooth and glossy. If there are a few unmelted bits, let the residual heat finish them.
Pour and smooth. Pour the chocolate filling into the chilled crust and spread with a spatula until even. A gentle tap on the counter helps remove air pockets.
Set in the fridge. Refrigerate for at least 2 hours, or until the filling is firm to the touch. Overnight is fine and often better for busy nights.
Finish and serve. Before serving, top with fresh berries and dust lightly with powdered sugar. Run a hot knife around slices for cleaner pieces if you want neater plating.
Time-saving notes: you can crush cookies in a bag, melt chocolate in the microwave in short bursts, and do most of the work while the kids finish homework. Precision isn’t required — if the filling is a touch softer, it still slices and tastes amazing.
Common Mistakes to Avoid
A little planning keeps this dessert quick and stress-free. Here are the top mistakes I see — and how to skip them so the family stays happy and cleanup stays minimal.
Mistake 1: Skipping the quick chill for the crust
If you skip the short chill after pressing the crust, the filling can seep and make the edges soft. A 10–15 minute fridge rest firms the crust so pouring filling is cleaner and less messy.
Mistake 2: Overheating the cream or boiling it
Boiling cream can change its texture and make the chocolate seize. Heat until just simmering — you want tiny bubbles at the edge, not a rolling boil. If you accidentally overheat, remove from heat and let sit a moment; stirring slowly often brings it back.
Mistake 3: Cutting while the tart is too soft
Want dinner cleared and dessert served fast? Resist slicing until the tart is set. Cutting too early makes a gooey mess and creates extra dishes. If you’re in a hurry, pop chilled tart in the freezer for 15–20 minutes to firm quickly, then slice.
Serving Suggestions for No Bake Dark Chocolate Tart
This tart is versatile. Here are a few simple serving directions that keep prep short and smiles wide.
Start with a simple pairing that keeps prep minimal and pleasing for kids and adults alike.
Kid-friendly sides
Serve with a small scoop of vanilla ice cream or a dollop of whipped cream. Fresh berries on the side are great for dipping and add color without extra cooking.
Easy add-ons
Top with a sprinkle of mini chocolate chips, crushed pretzels, or toasted nuts for texture. These take seconds to add and make the tart feel extra-special for a birthday or weekend treat.
Minimal prep plating
Cut wedges and place on plates with a couple of berries and a light dusting of powdered sugar. If you want cleaner slices, warm your knife under hot water and wipe between cuts — fast and effective.
Conclusion
I love how the No Bake Dark Chocolate Tart saves time, uses pantry-friendly ingredients, and still tastes indulgent enough for a family celebration or a peaceful weeknight dessert. It’s forgiving — small swaps or quick shortcuts won’t ruin the result — and it fits into real-life schedules because you can assemble it in under 30 minutes and chill it while you handle the rest of the evening. For a slightly different no-bake chocolate approach that’s also family-friendly, I sometimes look at recipes like No-Bake Chocolate Tart – Pretty. Simple. Sweet. Try it once and you’ll see how reliable it is; I bet you’ll make this again when you need a quick, comforting finish to a busy day.
FAQs About No Bake Dark Chocolate Tart
I recommend at least 2 hours in the fridge for the filling to firm properly. If you’re short on time, a 15–20 minute stint in the freezer will help speed things up, but check every 10 minutes so it doesn’t freeze solid.
Yes — cover the tart tightly and store it in the fridge for up to 4 days. For longer storage, wrap slices tightly and freeze up to 1 month. Thaw in the fridge before serving.
Absolutely. You can swap half the dark chocolate for milk chocolate or use semi-sweet chocolate chips to make the filling sweeter and more kid-approved. It still sets and keeps the same easy method.
Definitely. Make it the night before and keep it chilled. Add fresh berries and powdered sugar right before serving to keep the berries bright and the tart photo-ready.
For cleaner slices, chill the tart thoroughly before cutting. Warming your knife under hot water and wiping it dry between cuts also helps create neat, even wedges with minimal smearing.
No Bake Dark Chocolate Tart
Ingredients
Essentials
- 1 package Oreo cookies (about 9–10 ounces), crushed into fine crumbs for the crust
- 1/2 cup unsalted butter, melted binds the crust, adds richness
- 1 1/2 cups dark chocolate, chopped (or high-quality chips) the star of the filling
- 1 cup heavy cream creates the ganache-like filling
- 1 teaspoon vanilla extract simple flavor lift
- to taste fresh berries (strawberries, raspberries, or blueberries) for topping bright, family-friendly garnish
- to taste powdered sugar for light dusting before serving
Optional Add-ons
- a pinch sea salt on the filling for grown-up balance
- to taste crushed nuts (hazelnuts or toasted almonds) sprinkled on top for crunch
- 1 spoonful peanut butter mixed into the crust for a chocolate-peanut combo kids love
- to taste smear of jam (raspberry or strawberry) between crust and filling for a tart contrast
Substitutions and Shortcuts
- 1 store-bought chocolate cookie crust if you’re in a real hurry
- 3 tablespoons light olive oil (mild flavor) or any neutral oil to substitute butter, texture may vary
- 1 1/2 cups semi-sweet chips or a mix of dark and milk chocolate to please picky kids
- 1 cup half-and-half to substitute cream for a lighter filling
Instructions
Preparation
- Prep and crush the cookies by putting Oreo cookies in a zip-top bag and crushing with a rolling pin, or pulse in a food processor until fine crumbs form.
- Mix the crust by stirring the crumbs with melted butter in a bowl until combined and press the mixture into the bottom and up the sides of a 9-inch tart pan.
- Chill the crust briefly in the fridge for 10–15 minutes while you heat the cream.
- In a small saucepan, heat the heavy cream over medium heat until it just begins to simmer (tiny bubbles at the edge).
- Make the chocolate filling by removing the cream from heat and immediately adding the chopped dark chocolate and vanilla extract. Let sit 1 minute, then stir until smooth and glossy.
- Pour the chocolate filling into the chilled crust and spread with a spatula until even.
- Set in the fridge for at least 2 hours, or until the filling is firm to the touch.
- Finish by topping with fresh berries and dust lightly with powdered sugar. Cut with a hot knife for cleaner slices.