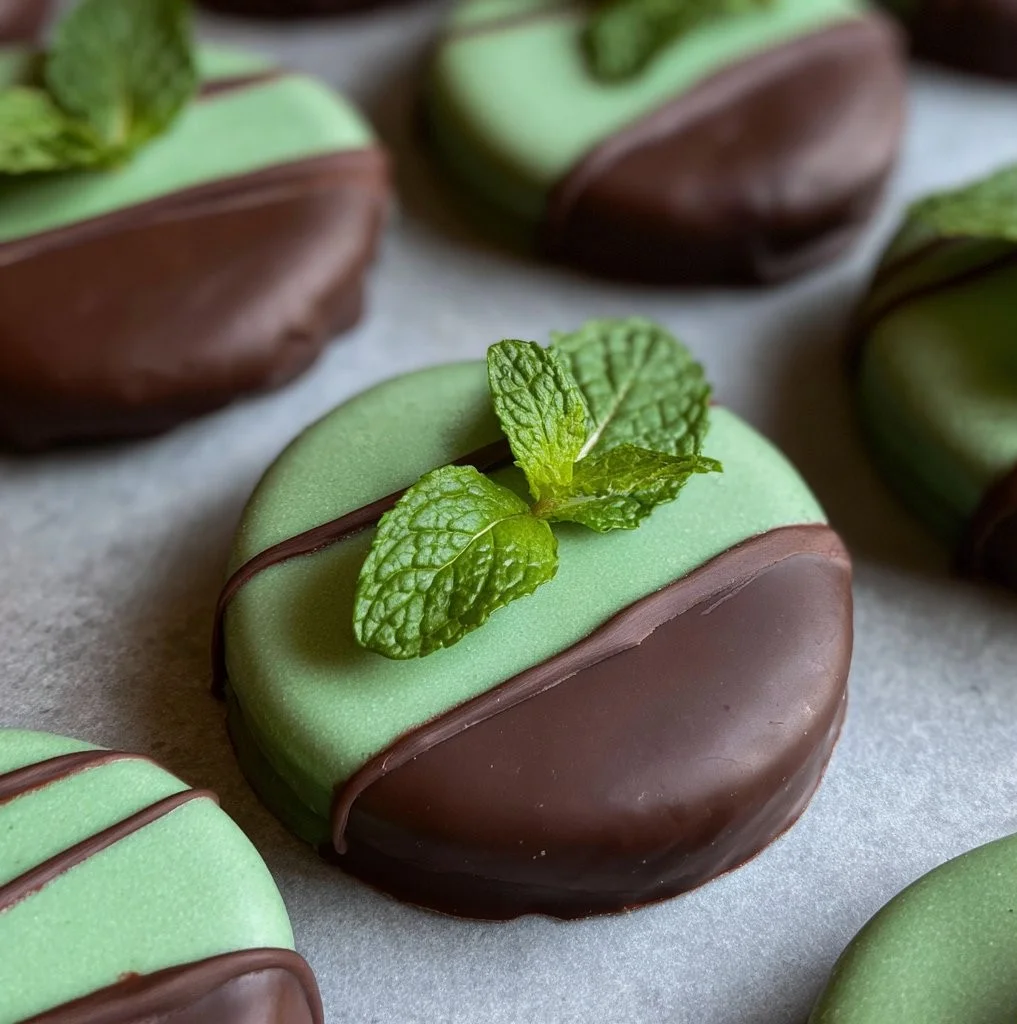
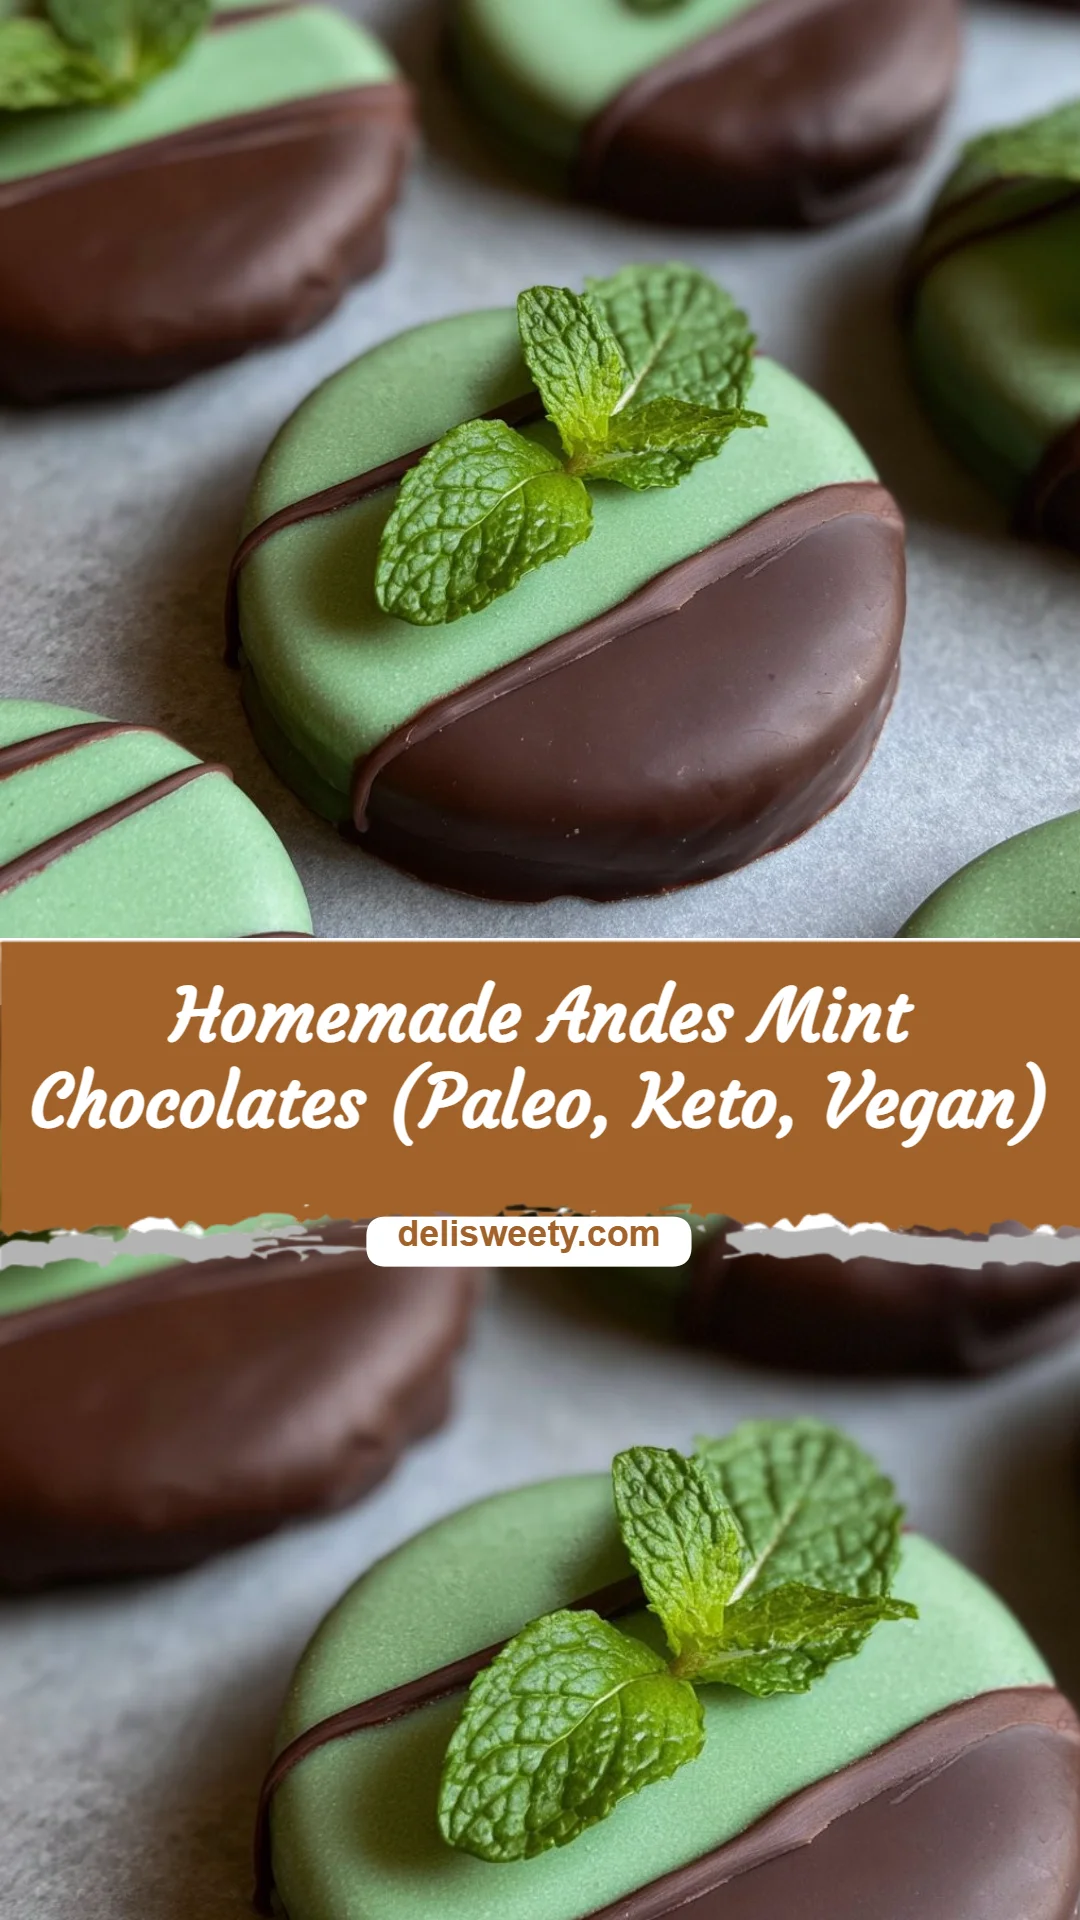
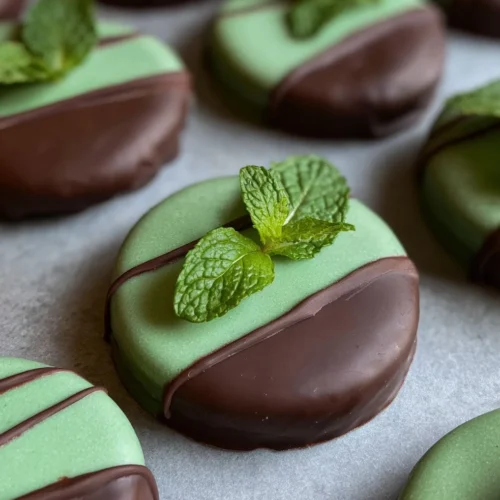
Homemade Andes Mint Chocolates (Paleo, Keto, Vegan)
I remember the first time I tried to recreate a mint-chocolate candy at home—I managed to melt half the kitchen gadgets, but I still tasted that bright peppermint and knew I was onto something cozy. If you’ve ever hesitated because you’re new to melting chocolate or worried about fancy ingredients, I get it; I’ve been there too. This Homemade Andes Mint Chocolates (Paleo, Keto, Vegan) recipe is gentle, forgiving, and perfect for beginners — no tempering, no stress, just simple handfuls of ingredients and a quiet afternoon treat.
A Quick Look at This Homemade Andes Mint Chocolates (Paleo, Keto, Vegan) Recipe
This recipe centers on two main ingredients: cacao butter for the creamy mint layer and dark chocolate for the outer shell. It’s a low-carb, plant-friendly take that fits paleo, keto, and vegan diets when you pick compliant chocolate. The big benefit is that you get a bright minty treat without sugar, and you control every ingredient. It’s forgiving for home cooks and friendly to anyone just learning how to melt and mold chocolate. Keep reading to see how a few small steps make a batch of candies that taste like they came from a cozy kitchen shop.
Ingredients You’ll Need for Homemade Andes Mint Chocolates (Paleo, Keto, Vegan)
Essentials
- 70 g cacao butter (about 5 tablespoons) — this makes the smooth, melt-in-your-mouth mint center.
- 1/4 cup powdered monk fruit — a zero-sugar sweetener that dissolves nicely into the melted cacao butter.
- 1 teaspoon peppermint flavor (or peppermint extract) — the star of the minty taste. Use a concentrated, food-grade extract.
- 1/4 to 1/2 teaspoon spirulina — optional but it gives a soft green hue without affecting flavor much (start small; the powder is potent).
- 1/3 cup dark chocolate chips — choose a high-quality, dairy-free chocolate if you need it vegan; aim for 70% cacao or more for a bold shell.
- Fresh mint leaves (optional) — pretty for garnish and adds aroma if you want a fresh look on top.
Optional add-ons
- A pinch of sea salt — sprinkled on the finished chocolates for contrast.
- MCT oil or a neutral oil (1/2 teaspoon) — smooths the dark chocolate if it seems overly thick while dipping.
- Vanilla extract (a drop) — warms the mint layer’s flavor for more depth.
- Cocoa nibs or crushed nuts — for a crunchy sprinkle over the chocolate before it sets (ensure nuts fit your diet).
Substitutions and shortcuts
- Powdered sweetener: If you don’t have powdered monk fruit, use powdered erythritol or a monk fruit/erythritol blend—make sure it’s powdered so it blends smoothly. Avoid granular sweeteners that won’t fully dissolve.
- Peppermint flavor: If you only have peppermint extract, use the same amount but taste a tiny bit first—some extracts are stronger. Peppermint oil should be used sparingly (a few drops only) and only if it’s food-grade.
- Spirulina color: If you’d rather skip spirulina, fresh mint blended into a tiny amount of the melted butter can add both color and a mild mintiness, but it may slightly change texture.
- Chocolate shell: If you prefer bars or a thicker shell, increase the dark chocolate to 1/2 cup. If you want a quicker route, use ready-made vegan chocolate melts.
- Molds: If you don’t have a mini silicone muffin pan, use a small candy mold, an ice cube tray, or even a lined mini muffin tin — silicone is easiest for popping out the centers.
How to Make Homemade Andes Mint Chocolates (Paleo, Keto, Vegan) Step-by-Step
I’ll walk you through each step as I’d do it in my kitchen, with little tips that make this easy and beginner-friendly.
Step 1 — Prep your tools and workspace
Start by lining a small baking sheet with parchment paper and set out a clean mini silicone muffin pan or small candy molds. Have a small saucepan, a heatproof bowl for melting chocolate, a whisk, a spoon for stirring, and a fork or dipping tool ready. Measure out your ingredients before heating anything — mise en place saves mistakes. If you plan to garnish with mint leaves, rinse and pat them dry now.
Step 2 — Melt the cacao butter gently
Place the 70 g (5 Tbsp) cacao butter in a small saucepan over the lowest heat setting. Stir continuously with a heatproof spatula so it melts evenly. Keep the heat very low — cacao butter is sensitive and you want it smooth, not scorched. Once fully melted and glossy, turn the heat off. If you prefer, you can melt the cacao butter in a double boiler or in short bursts in the microwave on low power, stirring every 10–15 seconds until melted.
Tip: If you see any little lumps, whisk vigorously off heat; they usually dissolve as the butter cools slightly while you continue.
Step 3 — Add the sweetener, mint, and color
With the saucepan off the heat, whisk in 1/4 cup powdered monk fruit, 1 teaspoon peppermint flavor, and 1/4 to 1/2 teaspoon spirulina (start with 1/4 tsp and increase if you want a deeper green). Whisk until completely smooth and lump-free. Taste a small drop on a spoon — the center should be sweet and distinctly minty. If it’s not sweet enough for your taste, add a little more powdered monk fruit, a quarter teaspoon at a time.
Note: Adding spirulina is mainly for color; it shouldn’t make the mint bitter at these small amounts. If you notice a seaweed-like flavor, reduce next time.
Step 4 — Spoon the mint filling into molds
Working quickly while the mixture is pourable, spoon or carefully pour the mint mixture into your mini silicone muffin pan or candy molds. Fill each cavity about three-quarters full — you’ll want room for the chocolate shell to fully enclose each mint button. This recipe should yield roughly 12 mini mints depending on mold size.
Tip: Tap the mold gently on the counter to remove little air bubbles and level the tops.
Step 5 — Freeze until firm
Place the filled molds in the freezer for 10 to 20 minutes, until the centers are completely firm. This step helps the mint centers hold their shape when you dip them into warm chocolate. I find 15 minutes is usually perfect; if your freezer is very cold, 10 minutes may be enough.
Step 6 — Melt the dark chocolate for the shell
While the mint centers chill, melt 1/3 cup dark chocolate chips in a clean saucepan over low heat or in a heatproof bowl set over simmering water (double boiler). Stir often and be careful not to let any steam or water touch the chocolate — even a drop can seize it. If the chocolate is thicker than you like for dipping, stir in just 1/4 to 1/2 teaspoon of neutral oil (like MCT or avocado oil) to loosen it.
Tip: Use a fork or dipping tool to test the chocolate consistency — it should coat and drip off smoothly.
Step 7 — Remove centers and dip in chocolate
Gently pop the mint centers out of the silicone mold. Work quickly while the chocolate is warm: using a fork, dip each mint into the melted dark chocolate, turning to coat completely. Lift with the fork, tap to remove excess chocolate, and place on the prepared parchment paper. If any mint splits or softens during handling, pop it back in the freezer for a couple minutes and try again.
Step 8 — Set the shell and decorate
Once all mints are dipped, let them rest on the parchment for a minute. If you want to drizzle extra chocolate, save a tablespoon or two of your melted chocolate and drizzle it back over the tops with a small spoon for a decorative finish. While the chocolate is still wet, press a tiny fresh mint leaf into the top if you like the look and aroma. A light dusting of flaky sea salt can also be lovely.
Step 9 — Final chill to set
Place the dipped mints in the fridge or freezer again until the chocolate shell is fully set — about 10–15 minutes in the fridge, or 5–10 minutes in the freezer. Once set, the chocolate should snap gently when you bite it and reveal the creamy mint center.
Step 10 — Store and enjoy
Store your Homemade Andes Mint Chocolates (Paleo, Keto, Vegan) in an airtight container in the refrigerator for a crisp bite, or keep them in the freezer if you prefer them extra firm and cool. They’ll last up to two weeks in the fridge and longer frozen. I usually label the container and tuck it on a shelf where I can’t find them too easily — self-control is the real challenge here.
Common Mistakes to Avoid
Making these candies is relaxing, but a few small missteps can derail results. In my experience, the biggest issues are easy to fix once you know what to watch for.
Mistake 1: Overheating the cacao butter or chocolate
High heat can change the texture and flavor of cacao butter and chocolate. Always melt over low heat or use a double boiler, and remove from heat as soon as it’s smooth. If chocolate seizes (becomes grainy), you may be able to revive it with a tiny bit of oil or warm, dry technique, but prevention is much simpler: low and slow is your friend.
Mistake 2: Using granular sweetener instead of powdered
If the monk fruit (or any sweetener) isn’t powdered, the mint mixture can be grainy and not fully dissolve. Powdered sweeteners blend into the warm cacao butter and create a silky center. If you only have granular sweetener, pulse it in a blender or spice grinder to powder it first.
Mistake 3: Dipping while the centers aren’t cold enough
If the mint centers aren’t firm, they can warp or soften when they meet warm chocolate. Make sure they’re quite cold — freezer-firm — before dipping. If you see softening, pop them back in the freezer for a few minutes. Patience here yields clean shapes and less mess.
Serving Suggestions for Homemade Andes Mint Chocolates (Paleo, Keto, Vegan)
These little candies are versatile — I love pairing them with simple things that highlight their cool mint and rich chocolate.
Start with a short paragraph to set the scene: they’re perfect for a cozy evening nibble, small gifts, or to keep in the fridge for a post-dinner sweet that won’t spike your sugar.
With coffee or herbal tea
Serve one or two alongside a mug of hot coffee or a minty herbal tea. The warm drink brightens the mint and softens the chocolate slightly for a melt-in-your-mouth moment.
As a homemade gift box
Nestle several chocolates into mini muffin liners and place them in a small box or jar with a label. They make a thoughtful, diet-friendly present for friends who follow paleo, keto, or vegan lifestyles.
In dessert platters or after-dinner plates
Add them to a dessert platter with nuts, dark chocolate squares, and fresh berries. They’re a lovely finish to a cozy dinner — small, rich, and minty without being overpowering.
Conclusion
I hope you feel excited to try this Homemade Andes Mint Chocolates (Paleo, Keto, Vegan) recipe — it truly is easier than it looks, and you can tweak the sweetness, color, and shell thickness to match your taste. I love how customizable it is: swap sweeteners, play with garnishes, or deepen the mint for more brightness. If you want to see another take on these minty chocolates or find inspiration for similar paleo candy recipes, I found a helpful resource at Bake It Paleo’s Homemade Andes Mint Chocolates page. And if you’re in the mood for a cool companion dessert, this recipe pairs nicely with a mint chocolate ice cream idea I enjoy: gnom-gnom’s Paleo & Keto Mint Chocolate Chip Ice Cream. Give them a try, savor a quiet afternoon with a mint and chocolate, and then tell me how yours turned out — I love hearing kitchen stories.
FAQs About Homemade Andes Mint Chocolates (Paleo, Keto, Vegan)
Yes — spirulina is optional and used mainly for color. If you skip it, the centers will be a pale cream color rather than green. You can replace the color with a tiny bit of finely blended fresh mint leaves, but be mindful that fresh mint can add moisture and a very slight texture change. The flavor will still be minty from the peppermint extract.
Stored in an airtight container, these chocolates keep up to two weeks in the refrigerator and several months in the freezer. For best texture, I keep a small stash in the fridge for immediate enjoyment and the rest in the freezer for long-term storage.
You can substitute powdered monk fruit with powdered erythritol or a monk fruit/erythritol blend. Make sure it’s powdered so it dissolves smoothly into the melted cacao butter. Avoid liquid sweeteners unless you’re prepared to slightly alter the texture — powdered is simplest.
Yes, regular dark chocolate chips will work for the shell. If you want to keep the recipe strictly paleo or vegan, choose dairy-free chocolate chips. Higher-cacao chocolate (70% or more) gives a nice contrast to the sweet mint center and is lower in sugar.
Graininess usually means the sweetener wasn’t powdered, or the mixture wasn’t whisked enough while the butter was warm. Next time, use a powdered sweetener and whisk thoroughly off heat until completely smooth. If you only have granulated sweetener, pulse it into a powder first in a small blender or spice grinder.
Homemade Andes Mint Chocolates
Ingredients
For the Mint Center
- 70 g cacao butter This makes the smooth, melt-in-your-mouth mint center.
- 1/4 cup powdered monk fruit A zero-sugar sweetener that dissolves nicely into the melted cacao butter.
- 1 teaspoon peppermint flavor Use a concentrated, food-grade extract.
- 1/4 to 1/2 teaspoon spirulina Optional. It gives a soft green hue without affecting flavor much (start small).
For the Chocolate Shell
- 1/3 cup dark chocolate chips Choose high-quality, dairy-free chocolate if you need it vegan.
Optional Add-ons
- 1 pinch sea salt Sprinkled on the finished chocolates for contrast.
- 1/2 teaspoon MCT oil or neutral oil Smooths the dark chocolate if it seems overly thick while dipping.
- 1 drop vanilla extract Warms the mint layer’s flavor for more depth.
- Fresh mint leaves Pretty for garnish and adds aroma.
Instructions
Preparation
- Line a small baking sheet with parchment paper and set out a mini silicone muffin pan or small candy molds.
- Measure out your ingredients before heating anything.
Melting Cacao Butter
- Place cacao butter in a small saucepan over the lowest heat setting and stir continuously until melted.
Mixing Ingredients
- Off the heat, whisk in powdered monk fruit, peppermint flavor, and spirulina until smooth.
Filling the Molds
- Spoon the mint mixture into the molds, filling each cavity three-quarters full.
Freezing Centers
- Freeze the filled molds for 10-20 minutes until firm.
Melting Dark Chocolate
- Melt dark chocolate chips over low heat, stirring often. Add oil if needed.
Dipping Centers
- Remove mint centers from molds, dip each into the melted dark chocolate, and tap to remove excess.
Setting the Shell
- Let the dipped mints rest on parchment until set.
Final Chill and Storage
- Place dipped mints in the fridge or freezer until the chocolate shell is fully set.
- Store in an airtight container in the refrigerator for up to two weeks.