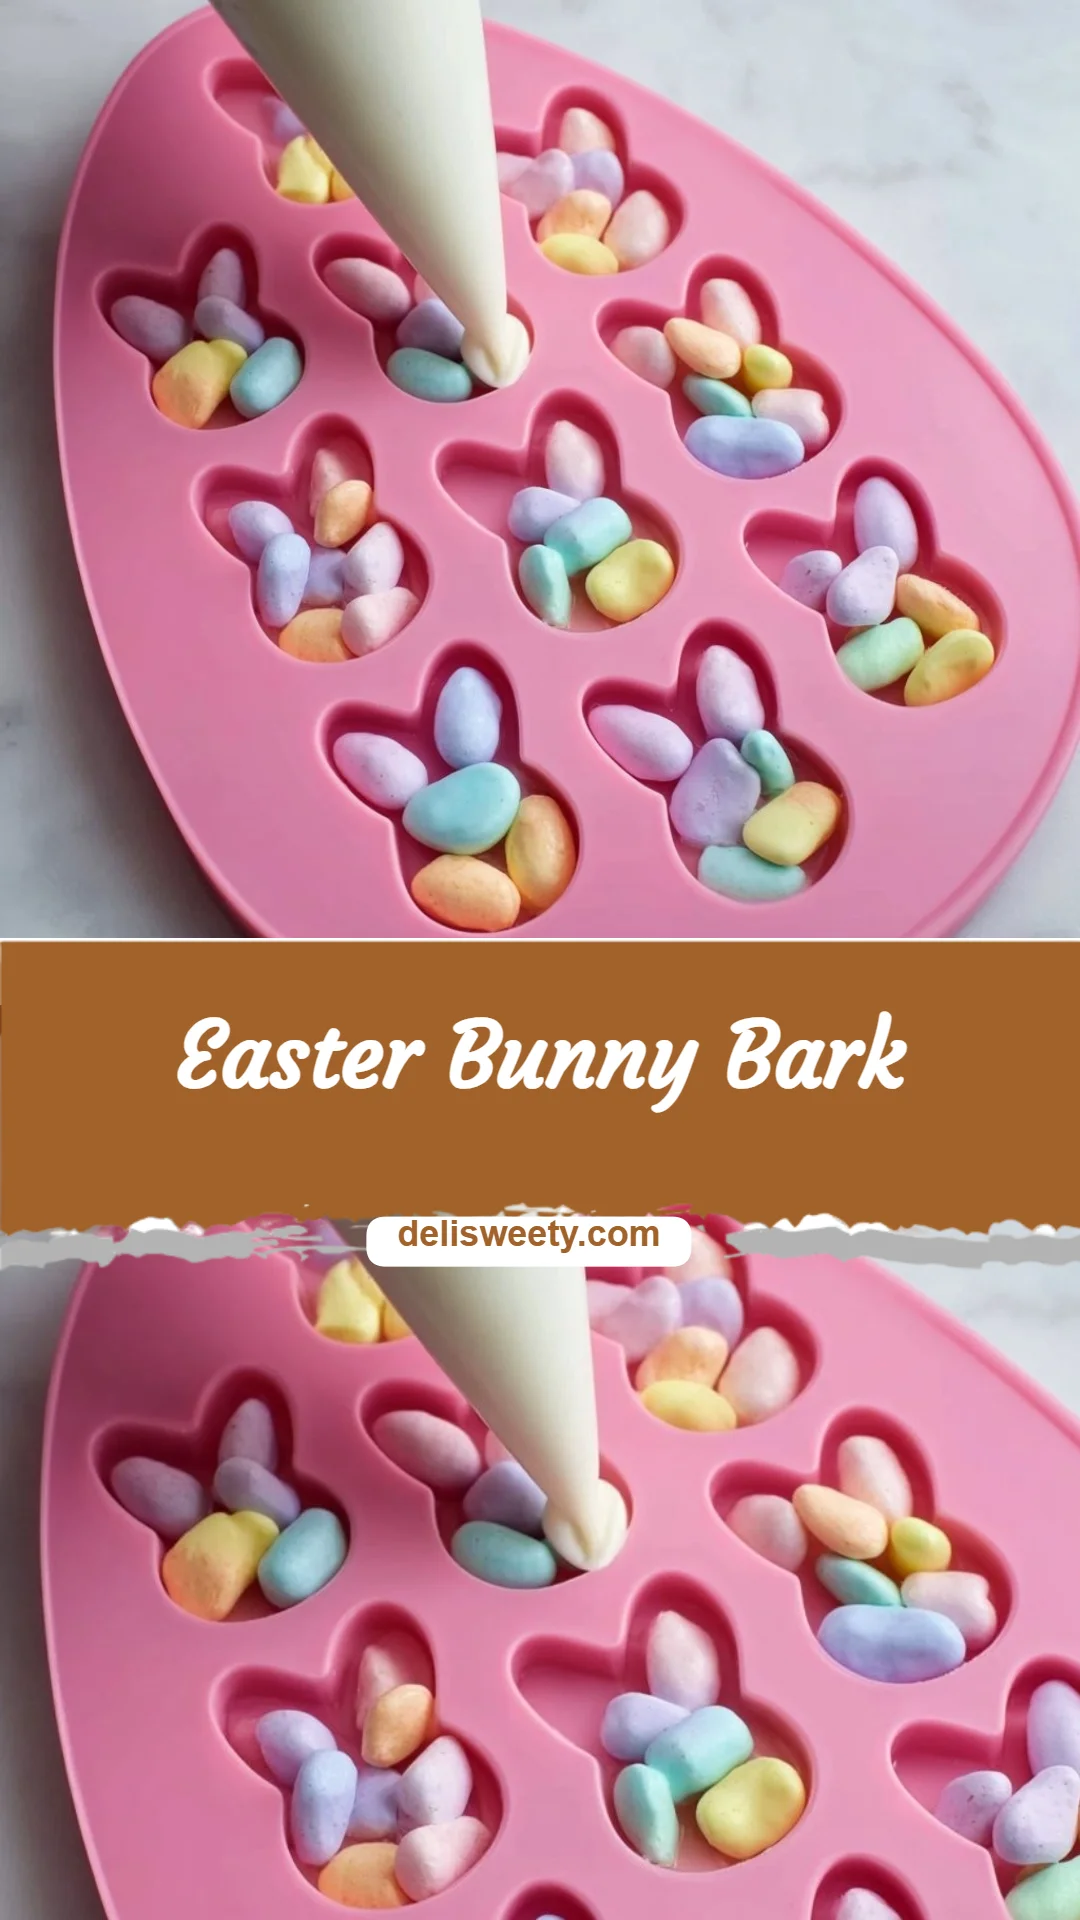
Easter Bunny Bark
I can still see the powdered-sugar smile of my little cousin after he unwrapped a bunny-shaped candy and proudly declared it “the best thing ever.” Do you ever get that sudden craving for something colorful, sweet, and oddly comforting that takes you back to childhood? If you’re a home cook who worries that candy-making will be fussy, I promise this Easter Bunny Bark is one of the friendliest projects you can try—perfect for beginners and busy cooks alike. If you like easy barks, you might also enjoy my take on a salted caramel pretzel bark that uses similarly simple techniques: salted caramel pretzel bark.
A Quick Look at This Easter Bunny Bark Recipe
This Easter Bunny Bark uses two main ingredients: bright white candy melting wafers and pastel-colored M&M’s. It’s a fast, no-bake treat that’s great for last-minute holiday gifts or a playful snack for kids. The big benefit is convenience—no candy thermometer, no melting chocolate pool, just a microwave and a piping bag. It’s perfect for home cooks and beginners because the steps are forgiving and the silicone bunny pan does most of the shaping for you. Keep reading to learn how a handful of ingredients and a few gentle taps can make 24 whimsical bunny pieces.
Ingredients You’ll Need for Easter Bunny Bark
Essentials
- Easter bunny silicone pan (24-cavity bunny mold recommended) — silicone releases easily and makes popping out the bunnies simple.
- Disposable piping bag — for a mess-free way to pour melted candy into the cavities.
- 120 pastel colored M&M’s (24 each pink, blue, green, yellow, and purple) — these give the bunnies their colorful popping centers.
- 2 cups bright white candy melting wafers (plus a bit more on hand if you’d like thicker pieces) — these melt smoothly and set with a glossy finish ideal for candy bark.
Optional add-ons
- Sprinkles (pastel nonpareils or sugar crystals) — for extra texture and sparkle on top.
- Mini chocolate chips or white chocolate chips — for speckling the inside if you want more chocolate flavor.
- A tiny bit of shortening or vegetable oil (about 1 teaspoon) — to thin the melted wafers slightly if they’re too thick for piping.
- Edible food markers — to draw tiny faces after the bunnies set, if you want them extra cute.
Substitutions and shortcuts
- If you don’t have a bunny silicone pan, use small candy molds, mini muffin tins lined with liners, or a flat baking sheet to make candy bark pieces.
- Instead of disposable piping bags, you can use a resealable plastic bag with a corner snipped off.
- If you prefer a slightly creamier white chocolate flavor, swap half the candy wafers for white chocolate chips, but melt gently and stir slowly to avoid seizing.
- For a speedier route, melt the full 2 cups of wafers at once and pour from a measuring cup, but work quickly: piping gives more control to keep each cavity neat.
- For inspiration using similar methods, check out another easy bark idea here: salted caramel pretzel bark.
How to Make Easter Bunny Bark Step-by-Step
I love outlining the steps so that even a complete beginner feels confident. This recipe yields 24 lovely bunny-shaped bark pieces and the method is intentionally forgiving.
Gather everything and prep the workspace.
- Place your bunny silicone pan on a flat baking sheet to make it stable while filling and moving.
- Count and sort the pastel M&M’s into groups of five (one of each color) so you can grab sets quickly.
- Have your disposable piping bag ready and scissors nearby for snipping the tip.
Melt the candy wafers (first batch).
- Place 1 cup of the bright white candy melting wafers into the disposable piping bag. Fold the top of the bag over your hand or a cup to keep it open and steady.
- Microwave the piping bag upright in 1-minute intervals at 50% power. After each minute, gently squeeze and knead the bag to help the wafers melt evenly. Repeat until the wafers are fully melted and smooth. (Tip: If you see chunks, heat in 15–20 second bursts at 50% power and knead between bursts—this avoids overheating.)
- If the melted wafers seem too thick to pipe, add a very small pinch of vegetable shortening or 1/4 teaspoon oil and knead through the bag to loosen the texture.
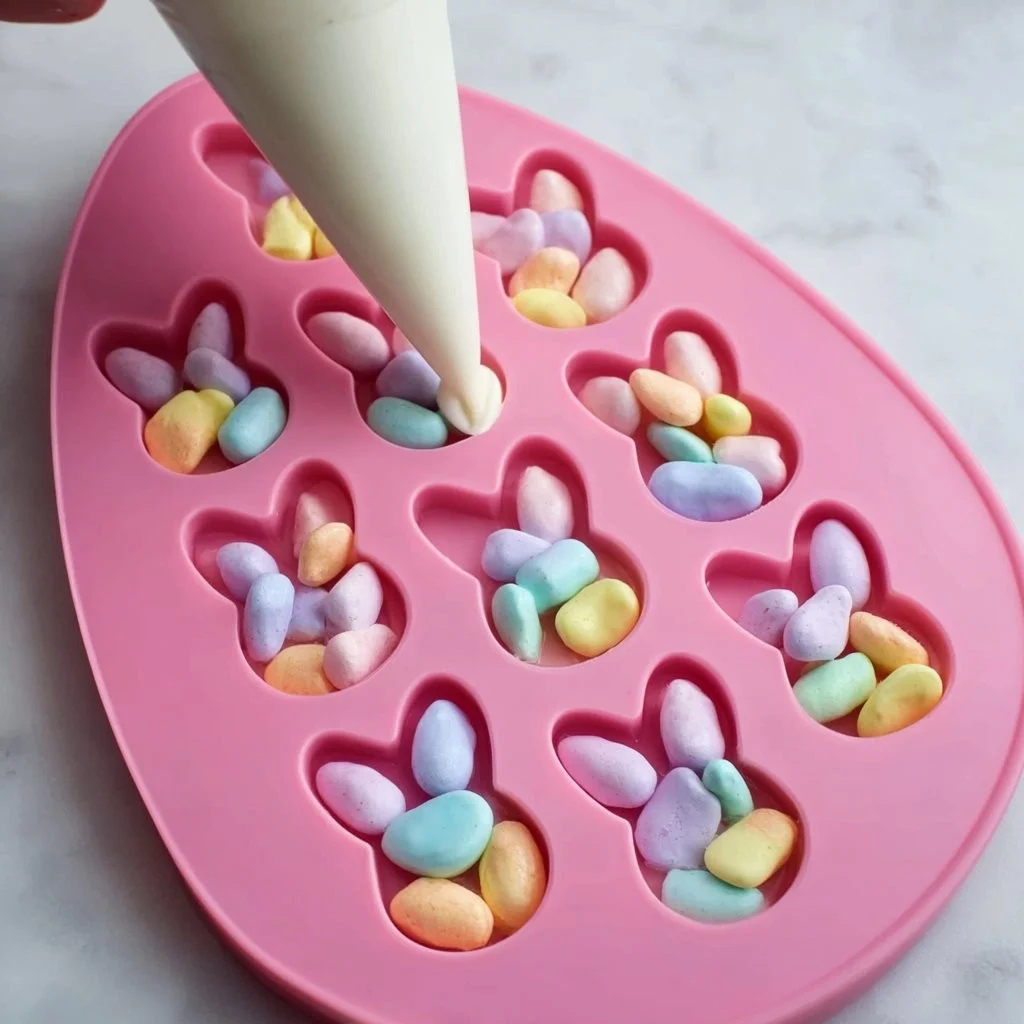
Add M&M’s to the bunny cavities.
- Pick up the bunny silicone pan and place one set of five pastel M&M’s into each cavity—one of each color (pink, blue, green, yellow, purple). Don’t worry about how they sit; some will lay flat, others on their sides, and that’s part of the charm. Make sure the candies fit comfortably and aren’t stacked on top of each other.
Pipe the melted candy into each cavity.
- Snip a small tip off the end of the piping bag—start small; you can always enlarge the hole if needed.
- Gently pipe the bright white candy melts into each bunny cavity, filling just enough to barely cover the tops of the M&M’s. Aim for a thin, even layer so the M&M colors peek through a bit. If a cavity gets too much, use the tip of a small offset spatula or the back of a teaspoon to spread it evenly.
- Lightly tap the silicone pan on the counter 2–3 times to remove air bubbles and help the melted candy settle around the candies.
Allow the candy to harden.
- Let the pan sit at room temperature until the candy is firm to the touch. If your kitchen is warm, pop the pan into the refrigerator for 10–15 minutes to speed up setting, but avoid leaving it too long as condensation can form when brought back to room temperature.
- Once firm, gently flex the silicone mold and push from the back to remove each bunny. Place the bunnies on a parchment-lined tray or plate.
Repeat for the remaining bunnies.
- Melt the remaining 1 cup of bright white wafers (or more if you want thicker pieces) following the same microwave method and repeat steps 3–5 until all 24 cavities are filled and set. If you ran out of wafers in a cavity, reheat the next batch as needed.
Clean up and store.
- Silicone pans are easy to clean—wash with warm soapy water or place in the dishwasher if labeled dishwasher-safe.
- Store your Easter Bunny Bark pieces in an airtight container at room temperature for up to two weeks; in warmer homes, keep them in the refrigerator.
Yield: 24 Easter Bunny Bark pieces.
Helpful tips I use every time:
- Work in small batches so the melted wafers stay smooth and easy to control.
- Keep your piping bag sealed and warm between uses; a warm cup you can tuck the bag into helps maintain fluidity.
- If you want two-tone detail, melt a small amount of a different color and use a toothpick to drag tiny decorative lines while the white layer is still tacky.
Common Mistakes to Avoid
Making candy doesn’t have to be scary, but a few common slip-ups can slow you down. I’ve learned these the cozy, hands-on way and I want to save you the small frustrations.
Mistake 1: Overheating the candy wafers
If you microwave at too high a power or for too long, the candy can scorch or become grainy. Always melt in short bursts at 50% power and knead the bag between intervals. A smooth, glossy melt is your goal.
Mistake 2: Filling cavities too full
Piping too much melted candy into each bunny can hide the colorful M&M’s or cause overflow. Pipe a thin layer that just covers the candies and tap the mold so the candy settles evenly. You can always add a second, thin coat if you want more thickness after the first layer sets.
Mistake 3: Trying to pop the bunnies out too soon
Removing the pieces before they’re fully set can warp the shape or leave fingerprints. If the candy is cool but not completely firm, tuck the mold in the fridge for 10 minutes then try again. Patience pays off with cleaner edges.
Serving Suggestions for Easter Bunny Bark
This candy is playful on its own, but it can also be part of an Easter spread or a cozy coffee table treat. Here are a few ways I like to serve it.
Start with a simple idea: arrange the bunnies on a pretty plate or in a clear jar so their pastel colors shine through; they make a sweet little centerpiece and an easy grab-and-go treat for guests.
On a dessert board
Scatter the bunnies among cookies, fresh fruit, and small squares of fudge for a seasonal dessert board that kids love. The color contrast makes the whole board feel festive.
Gift jars and favor bags
Layer bunnies into small mason jars or cellophane bags tied with pastel ribbon for hostess gifts or party favors. Add a handwritten tag with the date for a keepsake touch.
With coffee or hot chocolate
Serve a couple of bunnies alongside mugs of hot chocolate or coffee. They’re sweet enough to nibble between sips and make a lovely pairing with warm drinks on a chilly spring morning.
Conclusion
I hope this Easter Bunny Bark recipe has made you feel like you can tackle candy-making with a smile—because it really is easier than it looks. It’s flexible, so you can swap colors, add sprinkles, or make the bunnies larger or smaller to suit your baking mood. If you’d like a variation that leans into crunchy-sweet textures, I like the idea I found over at Sprinkle Bakes—her take on a simple bunny bark is a nice companion to this recipe: Easy Bunny Bark – Sprinkle Bakes. Try making a batch and sharing them with someone who could use a sweet, cozy surprise.
FAQs About Easter Bunny Bark
Easter Bunny Bark will keep in an airtight container at room temperature for up to two weeks. If your home is warm, refrigerate it for up to three weeks, but allow it to come to room temperature before serving to avoid condensation.
Yes — you can melt the wafers in a double boiler over low heat, stirring constantly until smooth. Be careful not to let any water steam into the wafers because moisture can make the candy seize and become grainy.
Absolutely. Colored candy melts work fine and can give you different looks. Keep in mind that darker colors may show fingerprints more easily, so handle with clean, dry hands.
Yes, you can use mini chocolate eggs, sprinkles, chopped nuts, or tiny marshmallows instead of or alongside M&M’s. Just be mindful of size so the candies fit comfortably in the bunny cavities.
To reduce air bubbles, tap the silicone mold gently on the counter after piping so trapped air can rise and escape. Also pipe slowly and try to keep the melted wafers free of rapid shaking or splashing during transfer.

Easter Bunny Bark
Ingredients
Essentials
- 1 pan Easter bunny silicone pan (24-cavity bunny mold recommended) Silicone releases easily for simple removal.
- 120 pieces pastel colored M&M’s (24 each pink, blue, green, yellow, and purple) These give the bunnies their colorful popping centers.
- 2 cups bright white candy melting wafers Plus a bit more on hand if you’d like thicker pieces.
Optional add-ons
- to taste sprinkles (pastel nonpareils or sugar crystals) For extra texture and sparkle on top.
- 1 cup mini chocolate chips or white chocolate chips For speckling the inside if you want more chocolate flavor.
- 1 tsp shortening or vegetable oil To thin the melted wafers slightly if they’re too thick for piping.
- 1 edible food markers To draw tiny faces after the bunnies set for a cute touch.
Instructions
Preparation
- Gather everything and prep the workspace.
- Place your bunny silicone pan on a flat baking sheet to make it stable while filling and moving.
- Count and sort the pastel M&M’s into groups of five (one of each color) for quick access.
- Have your disposable piping bag ready and scissors nearby for snipping the tip.
Melting
- Place 1 cup of bright white candy melting wafers into the disposable piping bag. Fold the top over to keep it open.
- Microwave the piping bag upright in 1-minute intervals at 50% power, squeezing and kneading the bag between bursts.
- Add a small pinch of shortening or 1/4 teaspoon oil to thin the melted wafers if necessary.
Assembly
- Place one set of five pastel M&M’s into each cavity of the bunny silicone pan.
- Snip a small tip off the piping bag and gently pipe melted candy into each cavity, filling just to cover the tops of the M&M’s.
- Lightly tap the pan on the counter 2-3 times to remove air bubbles.
Setting
- Let the pan sit at room temperature until the candy is firm, or refrigerate for 10-15 minutes if needed.
- Flex the silicone mold and push from the back to remove each bunny, placing them on a parchment-lined tray.
Repeat
- Repeat the melting and assembly process for the remaining candy wafers until all cavities are filled.
Clean up and storage
- Wash silicone pans with warm soapy water or place in the dishwasher.
- Store your Easter Bunny Bark in an airtight container at room temperature for up to two weeks.